To put ink on your Canon printer, first identify the correct cartridge model for your printer.
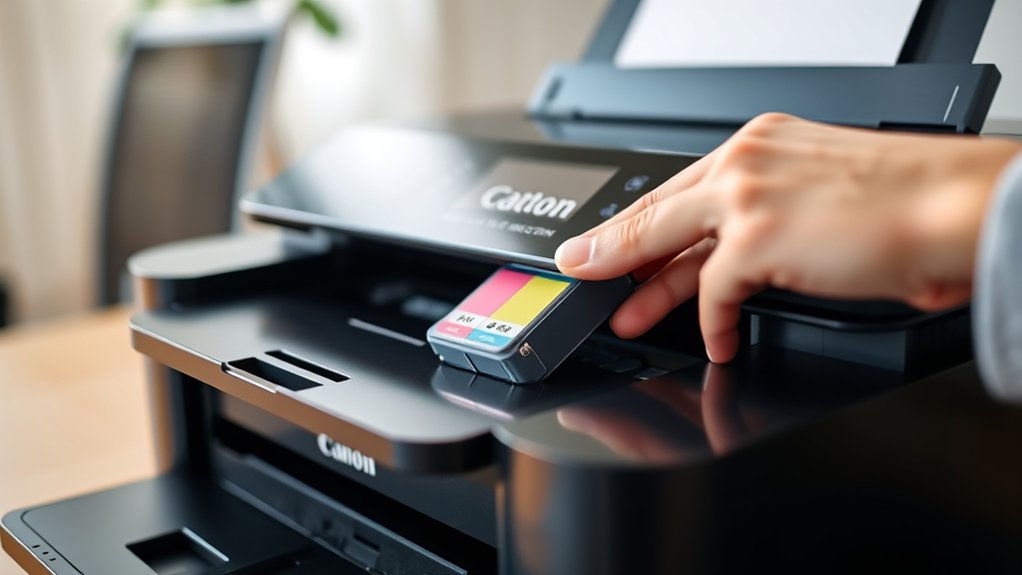
Power on the printer and open the cartridge access panel. Carefully remove the new cartridges without touching the electrical contacts or ink nozzles.
Remove any protective tapes from the cartridges. Firmly insert the cartridges into their designated slots until they click into place.
Close the cover securely.
Run the printer’s alignment procedure using plain paper for the best results. Following these steps helps avoid errors and maintain your printer’s performance.
There are also additional important steps worth knowing to ensure smooth operation.
Key Takeaways
- Power on the Canon printer and open the front cover to access the ink cartridge slots.
- Remove the new ink cartridge from packaging and carefully peel off protective tape without touching contacts.
- Insert the cartridge firmly into the matching color slot until it clicks into place.
- Close the printer cover and wait for the printer to recognize the newly installed cartridge.
- Perform an alignment via printer settings to ensure optimal print quality after installation.
Find the Right Ink Cartridge for Your Canon Printer
How do you guarantee you’re using the correct ink cartridge for your Canon printer? First, identify your printer model, as ink compatibility depends on it. Consult your printer’s manual or Canon’s official website to verify the compatible cartridge types.
Canon printers typically use either dye-based or pigment-based cartridges, each designed for specific models. Avoid generic cartridges unless they explicitly list your printer model to prevent malfunctions or poor print quality.
Check the cartridge packaging for model numbers matching your printer’s specifications. Remember, using incompatible ink cartridges may cause errors or damage your printer’s printhead.
Prepare Your Canon Printer: Cleaning and Setup Before Installing Ink
Before installing new ink, power on your Canon printer and open the cartridge slot carefully. Use a lint-free cloth to clean any dust or residue inside the cartridge area to guarantee proper contact.
This preparation helps prevent installation errors and maintains print quality.
Printer Cleaning Steps
Although it might seem unnecessary, thoroughly cleaning your Canon printer before installing new ink guarantees perfect print quality and prevents clogs or ink smudges. Start by turning off and unplugging the printer to guarantee safety.
Open the printer cover and carefully remove any dust or debris with a lint-free cloth. Use a slightly dampened cloth with distilled water to clean the print head area, avoiding excess moisture.
Inspect the paper feed rollers for dirt buildup; gently wipe them to maintain smooth paper feeding. This routine printer maintenance reduces the risk of ink smudging and guarantees consistent ink flow.
Finally, let all cleaned parts dry completely before proceeding to install the new ink cartridges, maintaining peak printer performance.
Cartridge Slot Preparation
Cartridge Slot Preparation
Once your Canon printer is clean and dry, focus on preparing the cartridge slot for the new ink installation. Proper slot preparation guarantees seamless ink cartridge placement and prevents damage. Follow these printer maintenance essentials:
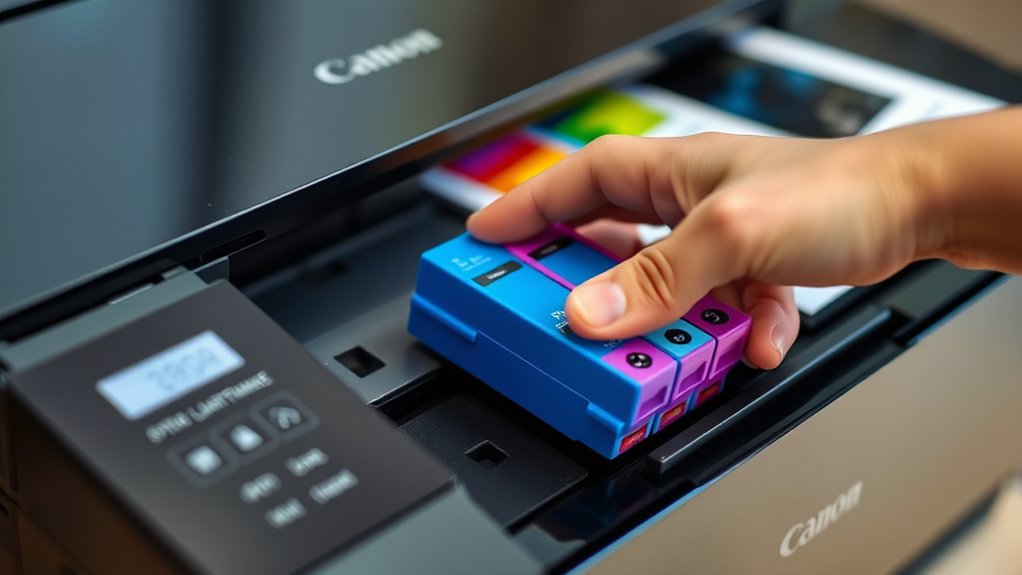
- Gently press the cartridge release tab, then remove the old cartridge using cartridge removal tips to avoid contact with electrical contacts.
- Inspect the cartridge slot for debris or dried ink; use a lint-free cloth slightly moistened with distilled water to clean.
- Verify that the cartridge slot is completely dry before proceeding to avoid electrical shorts.
- Align the new cartridge’s contacts with the slot’s connectors, guaranteeing correct orientation to secure proper installation.
These steps optimize printer functionality and extend the life of your Canon printer’s ink system.
Powering On Printer
Power on your Canon printer by pressing the designated power button to initiate its startup sequence. Verify the printer power source is connected and stable to avoid interruptions during the printer setup process.
Wait for the printer to complete its initialization, indicated by the display panel or status lights stabilizing. This confirms the printer is ready for the next steps. If the printer fails to power on, check the power cable connections and outlet functionality.
During startup, the printer performs self-diagnostics; do not interrupt this process to prevent errors. Once powered on, you can proceed with cleaning and preparing the cartridge slot. Maintaining proper printer power and completing the initial printer setup verifies a smooth ink installation and peak device performance.
How to Install Ink Cartridges on a Canon Printer
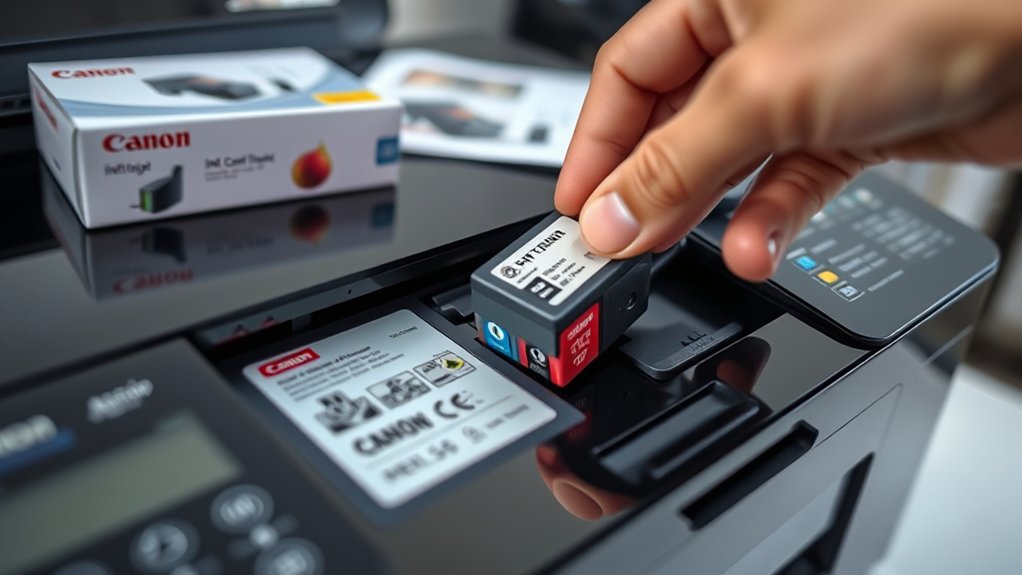
To install ink cartridges on a Canon printer, start by opening the printer’s front cover to access the cartridge holder. Identify the ink cartridge types compatible with your model, typically pigment black or dye-based color cartridges.
Follow these installation tips for accurate placement: Remove the new cartridge from its packaging, avoiding contact with the copper contacts. Gently remove the protective tape covering the ink nozzle.
Insert the cartridge into the corresponding slot, matching colors if applicable. Press down firmly until you hear a click, confirming secure installation.
Close the front cover and wait for the printer to recognize the cartridges. Proper installation guarantees peak printer performance and prevents ink leakage or errors.
How to Align Canon Ink Cartridges for Best Print Quality
Although installing ink cartridges correctly is essential, aligning them guarantees perfect print quality by preventing color misregistration and blurry text. To start, power on your Canon printer and load plain paper.
Access the printer’s control panel or software on your computer, then locate the print alignment option, usually under maintenance or settings. Initiate the print alignment process; the printer will print a test page with alignment patterns.
Examine the patterns carefully; the printer software will guide you to select the best-aligned patterns. This step adjusts the cartridges’ position, ensuring top-quality ink and precise print alignment.
Complete the process by confirming the alignment results. Regularly performing print alignment after cartridge installation helps maintain sharp, accurate prints and prolongs the printer’s performance.
How to Fix Your Canon Printer When It Doesn’t Recognize New Ink
If your Canon printer doesn’t recognize new ink, start by resetting the printer cartridge to clear any errors. Next, carefully remove the cartridge and clean the electrical contacts with a lint-free cloth and isopropyl alcohol.
This guarantees proper communication between the cartridge and printer for accurate detection.
Reset Printer Cartridge
When your Canon printer fails to recognize new ink cartridges, resetting the cartridge can resolve the issue quickly. A cartridge reset recalibrates the printer’s recognition system, which often restores proper print quality. Follow these steps precisely:
- Turn off your Canon printer and unplug it from the power source.
- Remove the ink cartridge that the printer doesn’t recognize.
- Press and hold the printer’s power button, then reconnect the power cable while holding the button for 10 seconds.
- Release the power button, reinstall the cartridge, and turn the printer back on.
This cartridge reset procedure forces the printer to detect the ink cartridge anew, often fixing recognition errors and restoring ideal print quality without needing additional tools or software.
Clean Ink Cartridge Contacts
Resetting your Canon printer cartridge often resolves recognition issues, but persistent problems may stem from dirty or oxidized contacts on the ink cartridge or inside the printer. To perform effective printer contact cleaning, first power off the printer and unplug it.
Remove the ink cartridges carefully, avoiding touch on the copper contacts. Use a lint-free cloth lightly dampened with distilled water or isopropyl alcohol to gently wipe the copper contacts on both the cartridge and the printer’s contact points.
Allow contacts to dry completely before reinserting the cartridges. This essential ink cartridge maintenance step guarantees reliable electrical connection and accurate ink detection. Repeat this cleaning process periodically to prevent recognition errors and maintain peak printer performance.
How to Safely Refill Canon Printer Ink Cartridges
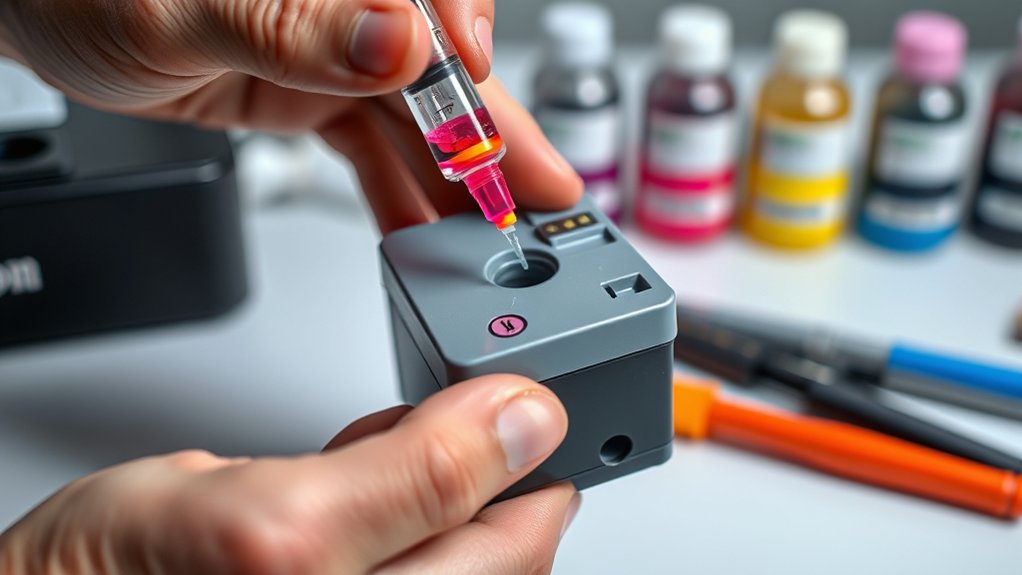
Refilling your Canon printer ink cartridges requires careful preparation to avoid damage and guarantee ideal print quality. First, identify the compatible ink types for your specific cartridge brands to prevent clogging or poor prints.
Next, gather a refill kit designed for your Canon model to facilitate precision. Then, clean the cartridge surface to avoid contamination during refilling. Finally, use a syringe or pipette from the kit to inject ink slowly into the cartridge’s refill hole, preventing air bubbles.
- Verify ink types and cartridge brands compatibility
- Use a dedicated refill kit for Canon cartridges
- Clean cartridge exterior thoroughly
- Inject ink slowly to avoid air pockets
Following these steps facilitates safe refilling and maintains cartridge functionality.
How to Avoid Common Ink Cartridge Installation Mistakes
Although installing ink cartridges seems straightforward, overlooking key steps can cause errors that affect print quality and damage your printer. First, always verify ink cartridge compatibility with your Canon model; using incorrect cartridges leads to malfunctions.
Proper cartridge installation is crucial to avoid print errors and prevent printer damage.
Remove protective tapes carefully without touching the electrical contacts to prevent connectivity issues. Insert cartridges firmly into their designated slots until they click, ensuring proper alignment.
If you experience installation errors, perform installation troubleshooting by restarting the printer or reseating cartridges. Avoid mixing cartridge brands or reffilled cartridges without confirming compatibility, as this often triggers error messages.
Follow these precise steps to maintain ideal printer performance and minimize installation errors that could compromise your device’s longevity and output quality.
How to Maintain Your Canon Printer to Extend Ink Cartridge Life
Proper installation sets the foundation for your Canon printer’s performance, but maintaining the printer itself plays a key role in extending the life of your ink cartridges. To optimize ink usage and guarantee cartridge longevity, follow these steps:
- Regularly clean the print head using the printer’s maintenance menu to prevent clogs that waste ink.
- Use the printer’s draft mode for non-critical documents to reduce ink consumption.
- Store cartridges properly if unused, avoiding exposure to extreme temperatures and humidity.
- Perform periodic nozzle checks to detect and fix any ink flow issues early.
Frequently Asked Questions
Can I Use Third-Party Ink Cartridges With My Canon Printer?
You can use third-party ink cartridges, but check third party compatibility carefully. Confirm ink quality considerations meet your printing needs to avoid damage or poor output.
Always verify manufacturer recommendations before installation to maintain printer performance.
How Do I Recycle Used Canon Ink Cartridges?
Think of ink cartridge recycling as an essential key to reducing environmental impact. You’ll find Canon’s recycling program online, then return used cartridges via prepaid mail or drop-off points. This ensures proper disposal and resource reuse.
What Should I Do if My Canon Printer Ink Runs Out Mid-Print?
If your Canon printer ink runs out mid-print, pause the print job immediately. Follow ink replacement tips: carefully replace the cartridge, verify proper installation, then resume printing to avoid further print job interruption and maintain print quality.
Are There Any Warranty Issues With Using Refilled Ink Cartridges?
Don’t put all your eggs in one basket; using refilled ink cartridges can void warranty terms if ink cartridge quality causes damage.
Always check your Canon warranty terms to guarantee refills won’t affect your coverage.
How Long Do Canon Ink Cartridges Typically Last Unopened?
Canon ink cartridges typically last 18-24 months unopened if stored properly. For ideal ink longevity, keep cartridges sealed in original packaging, away from direct sunlight, heat, and humidity.
This helps maintain cartridge storage integrity.
Conclusion
Now that you know exactly how to put ink on your Canon printer, you’re practically a printing wizard! With the right cartridge, proper installation, and alignment, your printer will deliver flawless prints like it’s powered by rocket fuel.
Avoid common mistakes, keep your printer clean, and refill cartridges safely to guarantee it runs smoothly for years. Follow these steps precisely, and you’ll never face ink issues again.
Your Canon printer will thank you with every perfect page when you know how to put ink on Canon printer correctly!