To screenprint on a shirt, start by gathering essential materials: a mesh screen, squeegee, ink, and stencil.
Screenprinting requires coating the screen with emulsion, then exposing your design using UV light.
Next, wash out the unexposed areas to create your stencil.
Place the shirt flat on a surface and align the screen using registration marks.
Apply evenly mixed ink at a 45-degree angle with firm pressure.
After printing, carefully lift the screen and allow the ink to dry completely.
Proper setup and cleanup are crucial to ensure sharp, lasting prints.
Explore further for detailed tips on preparation and troubleshooting.
Key Takeaways
- Gather essential screen printing supplies, including a mesh screen, squeegee, ink, stencil or emulsion, and a stable flat surface.
- Create a high-contrast design and prepare your screen by coating it with photo emulsion and exposing it to UV light with your artwork.
- Arrange a clean workspace, pre-treat and smooth the shirt fabric, and organize all materials within easy reach before printing.
- Align the screen using registration marks, apply ink with firm, even pressure using a squeegee at a 45-degree angle for sharp prints.
- Clean screens promptly after printing with water and screen cleaner, maintain tools regularly, and troubleshoot ink consistency for quality results.
Gather Screen Printing Supplies

To begin screen printing on a shirt, you’ll need to gather five essential supplies: a screen frame with mesh, a squeegee, screen printing ink, a stencil or emulsion for your design, and a flat surface for printing.
Select screen printing equipment with the appropriate mesh count; finer meshes suit detailed designs, while coarse meshes work for bold patterns. Your squeegee should have a firm, straight edge for even ink distribution.
Choose ink types based on fabric compatibility and durability. Plastisol inks offer vibrant colors and opacity, while water-based inks provide a softer feel and better breathability. Verify your flat surface is stable and smooth to maintain consistent pressure during printing.
Having these precise materials ready will set a solid foundation for accurate and professional screen printing results.
Create Your Design and Transfer It to the Screen
Start by designing your artwork with clear lines and high contrast for ideal screen exposure.
Next, prepare your screen by coating it evenly with photo emulsion in a dark room to avoid premature exposure.
Finally, transfer your design onto the screen using a transparency and UV light source to create a stencil for printing.
Designing Your Artwork
Create your artwork with clear, high-contrast elements to guarantee crisp screenprinting results. Start by gathering artistic inspiration that suits your project’s style. Use professional design software like Adobe Illustrator or CorelDRAW to create vector-based images, ensuring scalability without quality loss.
Focus on bold lines and simplified shapes, avoiding gradients or fine details that won’t reproduce well on screen. Once your design is finalized, convert it to black and white, maximizing contrast for ideal stencil creation. Export the file in a suitable format such as PDF or TIFF to maintain resolution.
Preparing the Screen
Before transferring your design onto the screen, you’ll need to properly prepare the screen itself by coating it with a light-sensitive emulsion. Choose the right screen type and mesh count: a higher mesh count offers finer detail, while a lower count allows more ink flow.
Clean the screen thoroughly to remove any dust or oils, then apply a thin, even layer of emulsion using a scoop coater. Let it dry in a dark, dust-free environment. The screen is now ready for exposure with your design.
| Screen Type | Mesh Count | Best Use |
|---|---|---|
| Aluminum | 110-160 | General purpose |
| Wood Frame | 230-305 | Fine detail prints |
| Plastic Frame | 80-110 | Heavy ink opacity prints |
Transferring Design Techniques
Transfer your design onto the prepared screen by first printing it onto a transparent film or acetate sheet. This step is essential for an accurate design transfer. Here’s a techniques overview to guide you:
Confirm your design is in high-contrast black and white for ideal exposure. Position the film precisely on the screen’s emulsion-coated side. Secure the film to prevent any movement during exposure.
Use a UV light source to expose the screen, hardening the emulsion except where the design blocks light. Rinse the screen with water to wash away unexposed emulsion, revealing your stencil.
Prepare Your Workspace and Shirt for Printing
Set up your workspace by arranging all printing materials within easy reach to maintain efficiency during the process.
Make sure the shirt fabric is clean and pre-treated with a suitable coating or adhesive to improve ink adhesion. Confirm proper drying or curing time for the pre-treatment before you begin printing.
Organize Printing Materials
Gather all your essential printing materials, including screens, squeegees, ink, and the shirt, in a clean, well-lit workspace. Proper organization improves efficiency and precision in your screen printing techniques. Focus on material storage to prevent contamination or damage.
Arrange screens by design and mesh count for quick access. Place squeegees flat to avoid warping of the rubber blade. Store ink in airtight containers, separating colors to prevent mixing.
Keep shirts clean and wrinkle-free by folding or laying flat. Maintain a clutter-free surface for accurate alignment and smooth printing.
Pre-Treat Shirt Fabric
Before you begin printing, you’ll need to properly pre-treat the shirt fabric to guarantee perfect ink adhesion and print quality. Different fabric types require specific pre-treatment methods to enhance the screenprinting process.
Start by cleaning the fabric surface to remove oils or sizing agents. Then, apply a suitable pre-treatment solution based on the fabric type. This step guarantees the ink bonds effectively and prevents bleeding or fading.
| Fabric Type | Recommended Pre Treatment Method |
|---|---|
| Cotton | Light heat press or chemical pretreatment |
| Polyester | Chemical pretreatment with adhesion promoter |
| Blends | Combination of heat and chemical treatment |
| Dark Fabrics | Use of white underbase pre-treatment |
| Delicate Fabrics | Minimal or no pre-treatment advised |
Follow these steps precisely to prepare your workspace and shirt for excellent screenprinting results.
Set Up and Align Your Screen on the Shirt
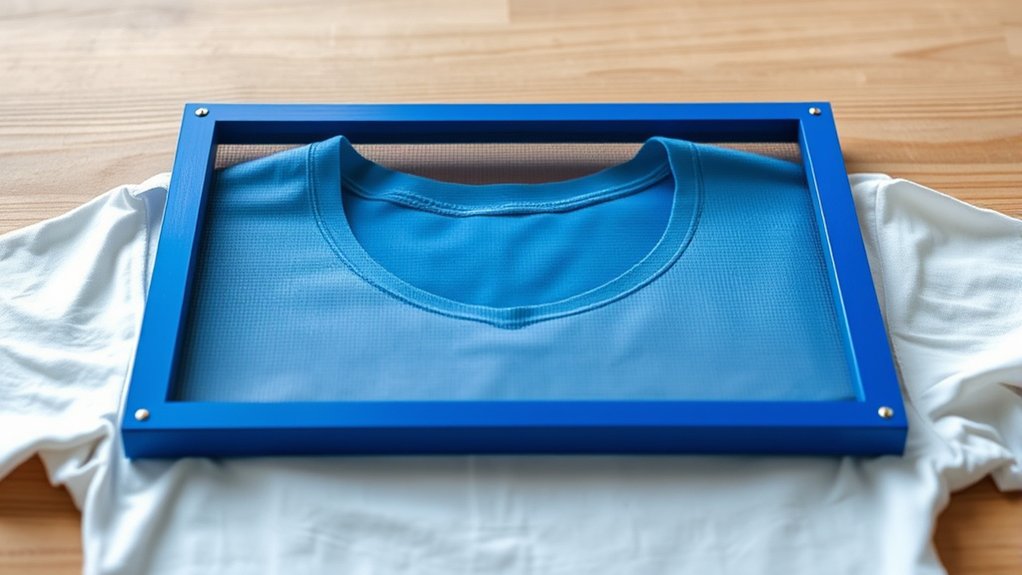
To align your screen on the shirt accurately, start by positioning the garment on a flat surface or platen, smoothing out any wrinkles that could distort the print. Next, focus on precise screen alignment by using registration marks to guarantee consistency across multiple prints. Follow these steps:
Place the shirt flat and secure it to prevent shifting. Lower the screen gently onto the shirt surface. Align the registration marks on the screen with those on the shirt or platen.
Adjust the screen position horizontally and vertically for exact placement. Lock the screen frame in place to maintain alignment during printing.
Mix and Apply Screen Printing Ink
Start by selecting the appropriate screen printing ink based on your fabric type and desired finish. Next, focus on achieving the correct ink consistency; it should be smooth, not too thick or runny, to guarantee even application.
Choose the right ink for your fabric and ensure it has the perfect consistency for smooth, even printing.
Use a palette knife to thoroughly mix the ink, incorporating any additional colors carefully to maintain uniform color mixing. Avoid introducing air bubbles during mixing, as they can affect print quality.
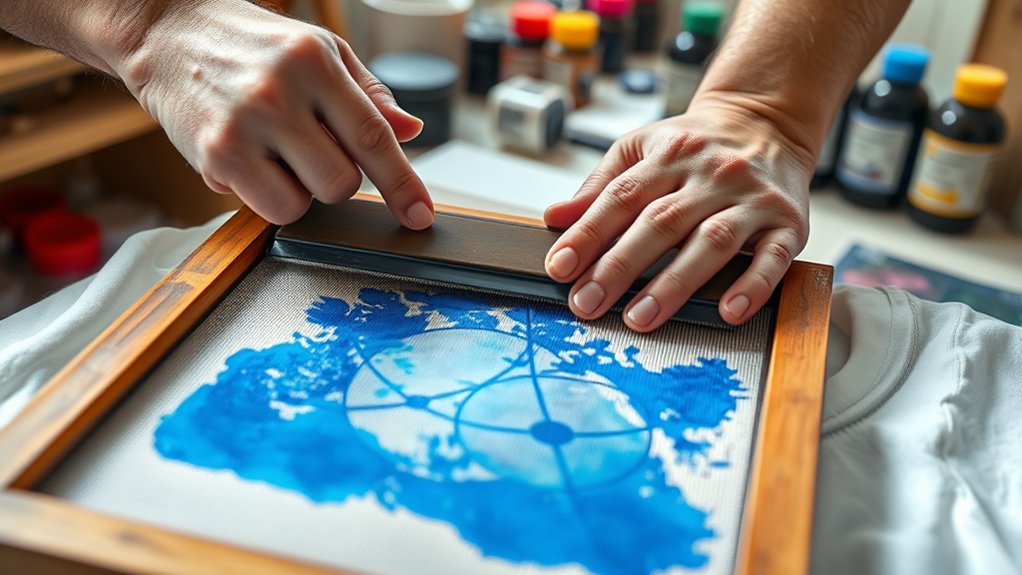
Once mixed, transfer the ink to your screen’s squeegee side. Hold the squeegee at a 45-degree angle and apply firm, even pressure to push the ink through the mesh.
Apply the ink in a controlled, steady stroke to prevent smudging or uneven coverage. Proper ink consistency and precise application are critical for a sharp, vibrant print.
Peel Screen and Dry Your Print
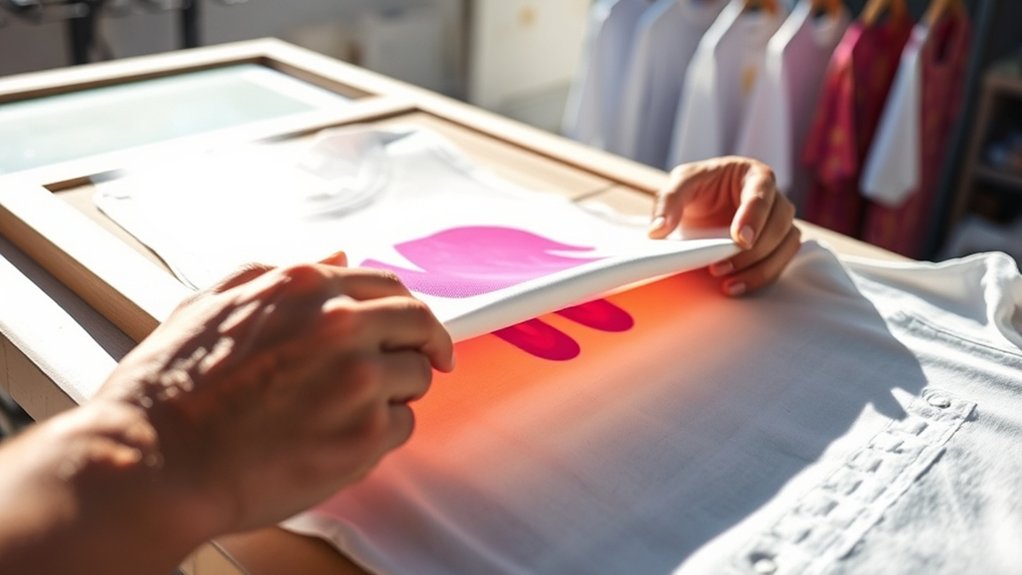
Lift the screen carefully and peel it away from the shirt immediately after applying the ink to prevent smudging. Employ the correct peel technique by lifting the screen at a consistent angle to avoid disturbing the fresh print.
Once peeled, focus on drying methods to set the ink properly. Consider these steps:
Lay the shirt flat on a clean surface to avoid ink displacement.
Use a heat gun or flash dryer to cure the print evenly.
Maintain a drying temperature between 320°F and 330°F for plastisol inks.
Allow water-based inks to air dry or use a fan-assisted setup.
Avoid stacking shirts until prints are fully dry to prevent smearing.
Following these instructions guarantees crisp prints and long-lasting results.
Clean Your Screen and Tools After Printing
Thoroughly cleaning your screen and tools immediately after printing preserves their quality and guarantees consistent results in future projects. Begin screen cleaning by rinsing the screen with lukewarm water to remove excess ink.
Apply a screen cleaner or degreaser, then gently scrub both sides with a soft brush to dissolve residual ink and emulsions. Rinse thoroughly to prevent clogging the mesh.
For tool maintenance, wipe squeegees and spatulas with a solvent or screen cleaner to remove ink buildup. Dry all components completely to avoid rust or damage.
Store your equipment in a dry, dust-free environment. Regular, precise screen cleaning and tool maintenance not only extend the lifespan of your materials but also secure sharp, clean prints every time you screenprint on a shirt.
Troubleshoot Common Screen Printing Issues
Maintaining clean screens and tools sets the foundation for quality prints, but issues can still arise during the screen printing process. To troubleshoot effectively, focus on these critical areas:
Check ink consistency; too thin causes ink bleeding, too thick affects print durability. Guarantee proper screen tension; loose screens reduce image sharpness.
Correct alignment issues by adjusting registration marks before each print. Verify fabric compatibility; some materials absorb ink differently, impacting adhesion and durability.
Optimize exposure time to prevent emulsion problems like under or overexposure, which can cause incomplete images or screen damage.
Frequently Asked Questions
Can I Screen Print on Materials Other Than Cotton Shirts?
Yes, you can screen print fabrics beyond cotton shirts. When working with alternative materials like polyester or blends, adjust ink types and curing methods to guarantee proper adhesion and durability. This ensures effective screen printing on these fabrics.
How Long Does a Screen-Printed Shirt Typically Last?
Like a well-forged sword, screen printing durability can last 20-50 washes if you use plastisol ink and proper curing. Avoid ink fading by washing inside out in cold water and air drying to preserve print sharpness.
Is Screen Printing Safe for Children to Do?
Yes, screen printing safety for children activities requires non-toxic inks, proper ventilation, and adult supervision. You should guarantee kids wear protective gear and follow instructions precisely to prevent skin irritation and inhalation of harmful chemicals.
Can I Use Multiple Colors in One Screen Print?
Absolutely, you can use multiple colors in one screen print; just avoid color mixing issues by applying each hue separately. Master registration techniques to align layers precisely, ensuring crisp, vibrant designs without muddling your colors.
How Do I Remove Unwanted Ink Stains From Clothes?
You’ll want to apply ink removal techniques by gently blotting stains with rubbing alcohol or a commercial ink remover. Follow with fabric care instructions.
Wash promptly in cold water to prevent setting and avoid heat until fully treated.
Conclusion
Now that you’ve mastered the basics of screen printing on a shirt, you’re ready to create custom designs with precision.
Did you know that 90% of all printed apparel uses screen printing due to its durability and vibrant results?
By following these steps carefully—from preparing your screen to cleaning up—you guarantee professional-quality prints every time.
Keep practicing, troubleshoot as needed, and your skills will only improve with each shirt you print. With consistent effort, you’ll become an expert in how to screenprint on a shirt.