To make a screenprint, start by preparing a high-contrast design and transferring it onto a coated screen using light-sensitive emulsion.
Expose the screen under controlled light, then rinse to reveal your stencil.
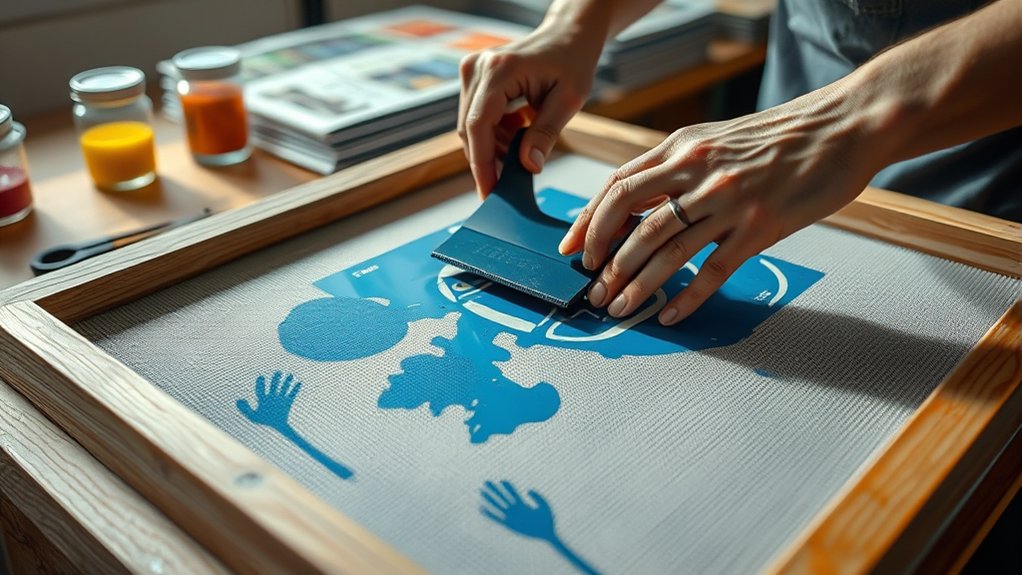
Place your substrate, apply compatible ink, and pull the squeegee evenly across the mesh at a steady angle to transfer your design.
Cure the print thoroughly for durability.
Mastering these precise steps guarantees sharp, lasting prints—continue to explore the process to refine your technique and troubleshoot challenges effectively.
Key Takeaways
- Prepare a high-contrast black-and-white design and print it on transparency film for stencil creation.
- Coat a clean screen with light-sensitive emulsion and dry it in a dark, dust-free area.
- Expose the emulsion-coated screen to light with the design transparency and wash out the stencil area.
- Place the screen on the substrate, apply ink, and use a squeegee at a consistent angle to transfer the design.
- Cure the print properly, clean the screen immediately after use, and maintain tools for consistent quality prints.
Gather Your Screen Printing Supplies

To begin screen printing, you’ll need to gather five essential supplies: a screen frame with mesh, photo emulsion, a squeegee, ink, and a substrate to print on. First, select a screen frame with the appropriate mesh count based on your design detail.
Next, choose a photo emulsion compatible with your ink type. The squeegee must have a firm rubber blade sized to your screen. Pick ink formulated for your substrate, whether fabric, paper, or plastic.
Finally, identify your substrate material, ensuring its surface suits screen printing. For acquiring these screen printing tools, consult specialized supply sources such as dedicated art stores, online retailers, or manufacturer websites.
Verify product specifications and compatibility to avoid printing errors. With all supplies on hand, you’ll be ready to proceed efficiently.
Prepare Your Design for Screen Printing
Before transferring your design onto the screen, you need to create a high-contrast, black-and-white image suitable for stencil creation. Start by importing your artwork into design software capable of handling vector or raster images. Use the software’s tools to simplify details and increase contrast, guaranteeing sharp edges for accurate exposure.
If your design involves multiple colors, perform color separation to isolate each hue into individual black-and-white layers. This step is essential because each color requires its own screen. Once separated, save each layer as a high-resolution file in a format compatible with your exposure unit, such as TIFF or PNG.
Double-check alignment marks on each file to maintain registration during printing. Proper design preparation guarantees clean, precise prints in the final screenprint process.
Prepare and Coat Your Screen for Exposure
Start by selecting a screen mesh count that matches your design’s detail and ink type. Proper screen preparation techniques guarantee sharp, consistent prints.
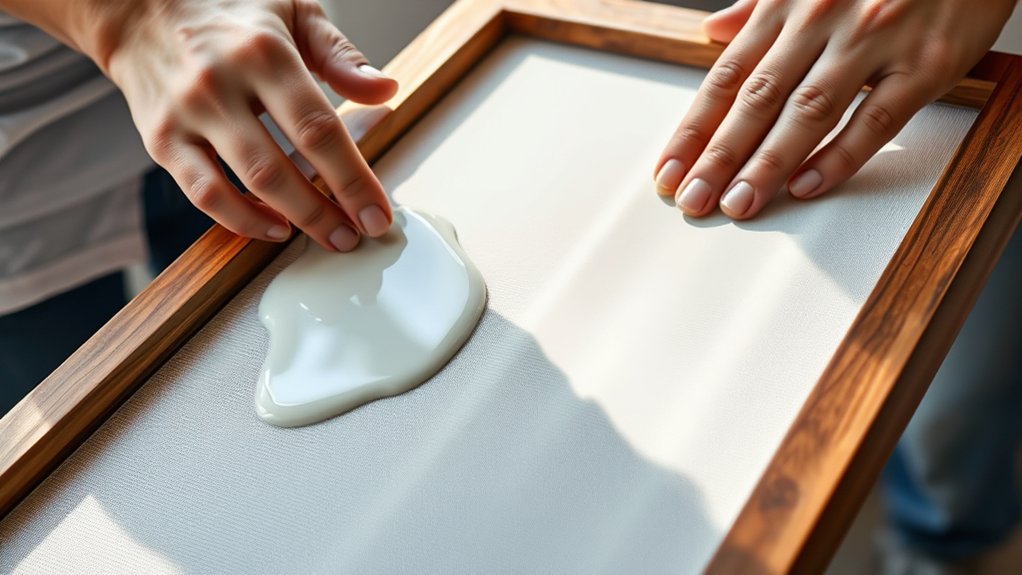
Begin by thoroughly cleaning the screen to remove oils and debris. Next, apply a light-sensitive emulsion using precise emulsion coating methods:
Start with a clean screen free of oils, then apply a light-sensitive emulsion carefully and evenly.
Use a scoop coater to spread emulsion evenly on both sides. Maintain a consistent angle to avoid uneven layers. Dry the screen horizontally in a dark, dust-free environment.
Confirm the emulsion layer is smooth and uniform to achieve ideal exposure results. Avoid overcoating, which can cause loss of detail, or undercoating, which leads to ink bleed.
Expose Your Screen and Set Up Your Workspace
A properly exposed screen is essential for capturing the fine details of your design. Begin by aligning your coated screen with the transparency film containing your artwork in the exposure unit. Use consistent screen exposure techniques, such as adjusting exposure time according to your emulsion’s sensitivity and light source intensity.
After exposure, wash out the screen gently to reveal your stencil. Dry it thoroughly before proceeding.
Next, focus on workspace organization tips to streamline your process. Arrange your tools, including squeegee, inks, and cleaning materials, within easy reach. Maintain a clean, dust-free environment to prevent imperfections.
Position your screen on a flat, stable surface with adequate lighting to inspect details accurately. Organizing your workspace efficiently guarantees precision and speeds up your workflow for the subsequent printing steps.
Apply Ink and Pull Your Screenprint Like a Pro
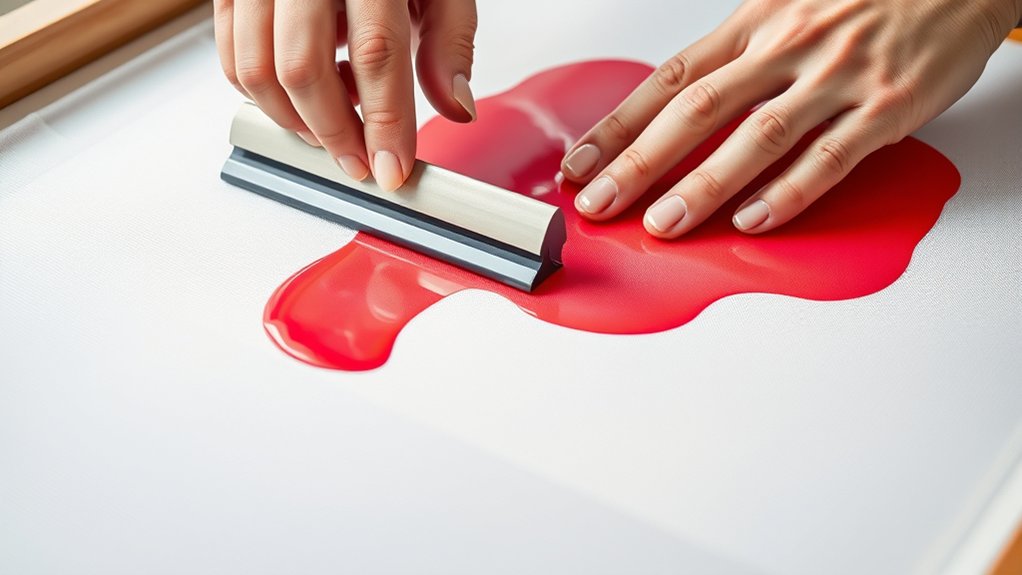
You’ll start by selecting ink that suits your fabric and design for ideal adhesion and vibrancy. Next, hold your squeegee at a consistent angle and apply even pressure to push the ink through the screen’s mesh.
Mastering these techniques guarantees a clean, sharp print with uniform ink distribution every time.
Choosing The Right Ink
Selecting the appropriate ink is essential for achieving sharp, durable prints and guaranteeing smooth application during the screenprinting process. You’ll need to take into account ink viscosity, curing methods, and the desired transparency to match your project requirements.
Choose between water based inks for eco friendly options and softer prints, plastisol inks for vibrant, durable finishes, or specialty inks for unique effects.
Key factors to evaluate include:
- Ink viscosity: affects flow and detail retention
- Color mixing: guarantees accurate, consistent hues
- Curing methods: determines ink durability and washfastness
Proper Squeegee Techniques
When applying ink through your screen, mastering proper squeegee techniques guarantees even coverage and sharp detail. Start by selecting the right squeegee material and width for your design. Maintain a consistent squeegee angle, typically 45 degrees, to optimize ink flow.
Control your squeegee pressure carefully; too much pressure forces excess ink, while too little results in incomplete prints. Adjust your squeegee speed to balance ink deposition and sharpness, slow enough to push ink evenly but fast enough to prevent drying.
Employ a smooth, steady squeegee technique, pulling in a straight line without lifting mid-stroke. Regular squeegee maintenance, including cleaning and checking for wear, assures consistent performance.
Mastering these elements of squeegee control is essential to producing professional-quality screenprints every time.
Consistent Printing Pressure
Three key factors determine consistent printing pressure: ink application, screen tension, and your pulling technique. Mastering these guarantees high-quality prints every time. Use precise pressure adjustment techniques to maintain uniform ink transfer across the substrate.
Apply just enough pressure to push ink through the mesh without causing smudges or incomplete coverage.
Focus on these print consistency methods:
Maintain even squeegee angle and speed to avoid pressure fluctuations.
Regularly check and adjust screen tension for stable resistance.
Control ink volume to prevent excess or insufficient deposition.
Cure and Finish Your Screenprint for Long-Lasting Results
Although you’ve carefully applied your ink, curing your screenprint properly is essential to confirm durability and washfastness. Start by selecting the appropriate curing technique for your ink type. Plastisol inks require heating to approximately 320°F (160°C) for about 1 minute, while water-based inks need lower temperatures and longer drying times.
Use a conveyor dryer or flash dryer to maintain consistent heat, avoiding under- or over-curing, which can weaken the print. After curing, inspect the print for uniform gloss and adhesion. Add finishing touches such as softeners or protective coatings if desired, enhancing texture and longevity.
Finally, allow the print to cool fully before handling or washing. By following these precise steps, you confirm your screenprint remains vibrant and resilient through repeated use and laundering.
Troubleshoot Common Screen Printing Problems
If you notice ink smudging, adjust your squeegee pressure and drying time to prevent excess ink transfer.
When mesh clogging occurs, clean your screen thoroughly with appropriate solvents and check for proper ink consistency.
For registration issues, realign your screen and use registration marks to guarantee precise layering.
Ink Smudging Solutions
When your prints come out with smudged ink, it usually means the ink hasn’t dried properly or the screen pressure was uneven during printing. To address this, first adjust the ink consistency; thicker ink reduces spreading and smudging.
Next, control drying time by allowing prints to cure fully before handling. Finally, apply precise cleaning techniques to remove excess ink from the screen and squeegee, avoiding ink buildup that causes smears.
Implement these steps for effective smudge prevention:
- Use a consistent ink viscosity tailored to your substrate.
- Allow adequate drying time under controlled temperature and humidity.
- Regularly clean the screen and tools to maintain sharp image edges.
These measures guarantee sharp, clean prints with minimal smudging.
Mesh Clogging Fixes
Since clogged mesh screens can severely impact print quality by blocking ink flow, you need to address this issue promptly to maintain consistent results. Start by implementing effective mesh maintenance tips, such as routinely inspecting your screen for dried ink or debris buildup.
Use proper screen cleaning techniques like soaking the mesh in a recommended solvent and gently scrubbing with a soft brush to clear blockages without damaging the mesh fibers. Always rinse thoroughly with water to remove residual chemicals. Avoid harsh scrubbing that can weaken the mesh tension.
Additionally, make sure you’re using compatible inks and emulsions to reduce clogging risks. Regularly applying these mesh maintenance tips and screen cleaning techniques will help you maintain ideal ink flow and prolong the lifespan of your screens, ensuring crisp, high-quality prints every time.
Registration Alignment Tips
How do you guarantee perfect registration alignment in multi-color screen printing? Precise registration techniques and reliable alignment tools are key. Start by securing your screens firmly to prevent any shift during printing. Use alignment marks on both the substrate and screens to guide placement consistently. Employ registration pins or a vacuum table for mechanical accuracy.
Follow these essential tips:
- Utilize transparent registration guides on each screen for visual confirmation.
- Adjust micro-registration screws incrementally to fine-tune alignment.
- Regularly calibrate your press to maintain consistent screen positioning.
Frequently Asked Questions
What Types of Fabrics Work Best for Screen Printing?
You’ll find cotton blends work best for screen printing because they absorb ink evenly and produce sharp images.
Synthetic fabric types often resist ink, so prioritize natural or blended fibers to guarantee vibrant, durable prints.
How Do I Choose the Right Ink for Different Materials?
You choose ink types based on material compatibility; plastisol suits cotton, water-based works well on light fabrics, and solvent-based inks fit synthetics. Match ink chemistry to fabric properties to guarantee adhesion, durability, and vibrant prints.
Can Screen Printing Be Done on Non-Flat Surfaces?
Think of screen printing on non-flat surfaces as painting on a curve. Yes, you can do it! Master non-flat techniques and guarantee thorough surface preparation for precise ink application and lasting results on irregular shapes.
What Safety Precautions Should I Take During Screen Printing?
You should wear protective gear like gloves and goggles to prevent chemical exposure. Confirm your workspace ventilation is adequate to avoid inhaling fumes.
Also, handle inks and cleaning solvents carefully, following all safety guidelines precisely.
How Do I Clean and Store Screens After Use?
Don’t worry about screen cleaning being tedious; rinse your screen immediately with water, apply screen cleaner, then scrub gently.
For screen storage, keep screens dry, flat, and away from direct sunlight to preserve mesh tension and coating.
Conclusion
Now that you’ve mastered the essentials of screen printing, you’re well-equipped to bring your designs to life with professional flair. Remember, every misstep is just a “learning opportunity” guiding you toward perfection.
Keep refining your technique, maintain your workspace meticulously, and don’t shy away from troubleshooting. With patience and precision, your prints will consistently impress.
Embrace the process—it’s less about mistakes and more about crafting lasting, quality results. By following these steps, you’ll truly excel in how to make screenprint with confidence and skill.