Screenprinting works by forcing ink through a fine mesh screen that’s coated with a stencil blocking unwanted areas.
This technique involves coating the screen with a photosensitive emulsion and exposing it to light to create your design.
After that, you use a squeegee to push ink through the open mesh sections onto your substrate.
Choosing the right screen mesh, ink, and squeegee is essential for precision and durability.
Mastering these steps guarantees sharp prints.
Explore further to perfect your process and avoid common pitfalls.
Key Takeaways
- Screenprinting uses a mesh screen and stencil to transfer ink onto a substrate through open areas of the mesh.
- Photosensitive emulsion creates the stencil by blocking ink in non-image areas on the screen.
- A squeegee presses ink through the mesh openings onto the printing surface with consistent pressure.
- Different mesh counts control ink flow and detail, selected based on design complexity and ink type.
- Printed ink is cured by heat, typically at 320°F for plastisol inks, to ensure durability and washfastness.
Understanding the Screenprinting Process
Although screenprinting may seem straightforward, understanding its process requires knowing how each component interacts to produce a high-quality print. Rooted in a rich screenprinting history dating back centuries, the technique involves forcing ink through a fine mesh screen, selectively blocked by a stencil to form a precise image.
You begin by preparing the screen with a photosensitive emulsion, which hardens when exposed to light, creating the stencil. Then, you place the screen on your substrate and use a squeegee to push ink through the unblocked areas.
Mastering various screenprinting techniques like single-color, multi-layer, and halftone printing enables you to control ink density and detail. Each step demands accuracy, ensuring crisp, consistent prints essential for professional results.
Essential Screenprinting Materials and Tools
To get started with screenprinting, you’ll need specific supplies like mesh screens, photo emulsion, and specialized inks designed for different substrates. Alongside these, essential equipment such as a sturdy printing press, squeegees with precise edges, and a reliable exposure unit are vital for accurate image transfer.
Understanding the function and quality of each material and tool will guarantee consistent, high-quality prints.
Key Screenprinting Supplies
Mastering screenprinting requires a specific set of materials and tools that guarantee accuracy and quality in each print. First, you’ll need high-quality screenprinting inks, chosen based on fabric type and desired durability; these inks must have ideal viscosity for smooth transfer.
Next, precise screenprinting squeegees are essential. They control ink distribution across the mesh screen, and the blade’s durometer directly affects print sharpness and ink deposit. Additionally, durable mesh screens with appropriate mesh counts are critical for detail resolution.
You’ll also require stencil materials, such as photo emulsion, to create accurate image areas on the screen. Each component must be compatible and calibrated carefully to maintain consistent ink flow and adhesion, ensuring every print meets professional standards without errors or misalignment.
Essential Printing Equipment
Several key pieces of equipment form the backbone of any effective screenprinting setup. First, you’ll need reliable screenprinting machines designed to hold screens firmly and allow precise ink application. These machines vary from manual presses to automated systems, each offering different levels of control and efficiency.
Next, selecting the proper ink types is vital; water-based inks suit soft prints, while plastisol inks provide durability and opacity on various substrates. You’ll also require high-quality screens with appropriate mesh counts to control ink flow accurately.
In addition, squeegees with specific hardness levels help push ink evenly through the mesh. Precise registration systems guarantee multi-color designs align perfectly.
Finally, drying equipment like flash dryers or conveyor dryers solidifies prints consistently. Combining these tools optimizes print quality and production speed in your screenprinting process.
How to Create and Transfer Your Design for Screenprinting
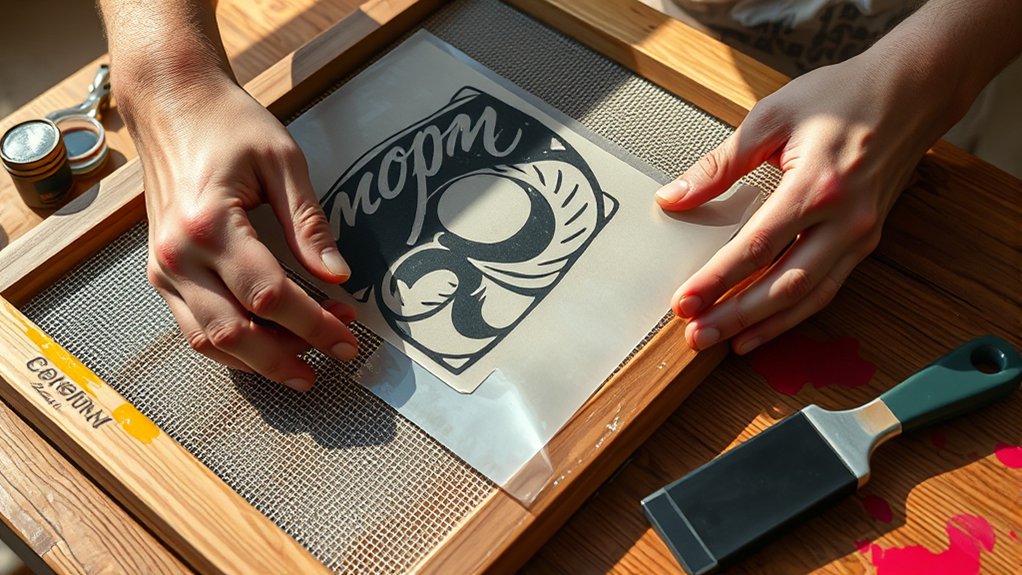
Although creating a design might seem straightforward, preparing it specifically for screenprinting requires careful attention to detail and format. You’ll start with digital preparation, guaranteeing your artwork is high-contrast and in vector format for precise design transfer.
After finalizing your design, print it onto a transparent film or acetate, which serves as your stencil.
| Step | Description | Tool/Material |
|---|---|---|
| 1. Design | Create vector artwork | Adobe Illustrator |
| 2. Prepare | Adjust contrast, size | Photoshop |
| 3. Print | Output on transparent film | Laser printer |
| 4. Position | Align film on coated screen | Registration marks |
| 5. Transfer | Expose to UV light | Exposure unit |
This process guarantees accurate design transfer, critical for sharp prints.
How to Prepare Your Screen for Screenprinting
To prepare your screen for screenprinting, start by selecting the appropriate mesh count based on your design’s detail and ink type.
Next, apply a consistent, even layer of emulsion to the screen, ensuring full coverage without excess buildup.
Finally, dry the coated screen thoroughly in a dust-free environment and inspect it carefully for any imperfections before proceeding.
Selecting The Right Mesh
When you prepare your screen for screenprinting, choosing the right mesh is essential because it directly affects ink flow and print detail. Mesh counts, measured as threads per inch, determine the screen’s fineness; higher counts (e.g., 230-305) produce finer detail with less ink deposit, while lower counts (e.g., 110-160) allow more ink flow for bold prints.
Mesh types vary primarily between nylon and polyester. Polyester is preferred for durability and consistent tension. Select mesh counts based on your design’s complexity and ink viscosity; thicker inks require lower mesh counts for adequate transfer.
Additionally, consider the fabric or substrate to guarantee ideal adhesion. By matching mesh counts and types to your project’s specifications, you’ll achieve precise, high-quality prints with controlled ink application.
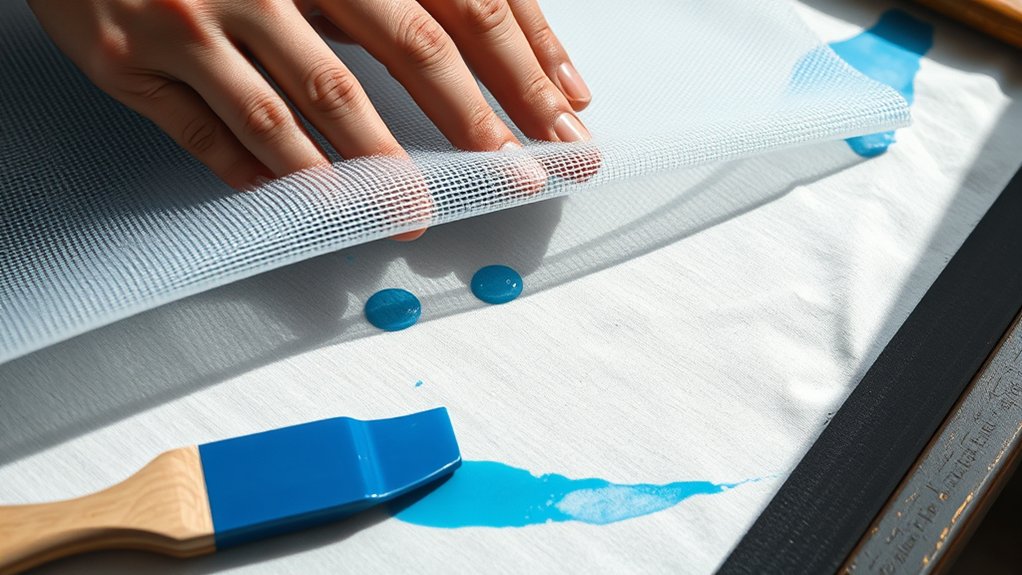
Coating The Screen Properly
Since applying the emulsion correctly guarantees sharp stencil edges and prevents ink bleeding, you’ll need to coat your screen with a light-sensitive emulsion in a controlled environment. Begin your screen preparation by confirming the screen is clean and free of dust or oils, as contaminants compromise emulsion adhesion.
Use a scoop coater to apply an even layer of emulsion on the print side, holding it at a 45-degree angle. Then, coat the squeegee side with a thinner layer to seal the mesh. Maintain consistent pressure and speed during emulsion application to avoid streaks or uneven thickness.
Proper coating guarantees the stencil’s durability and print precision. Avoid exposing the coated screen to strong light sources before curing, as premature exposure weakens the emulsion’s effectiveness.
Drying And Inspecting Screen
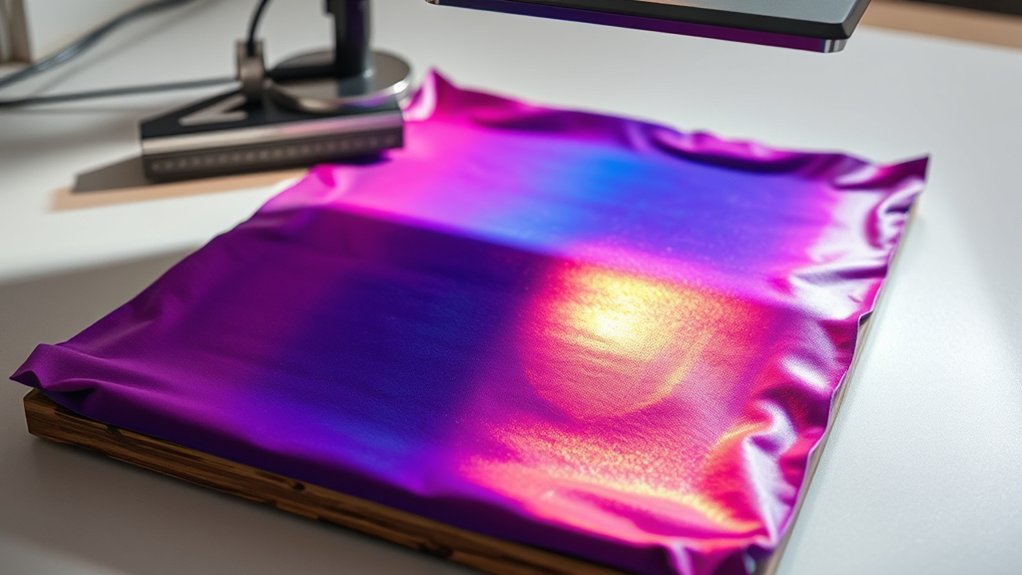
Allow the coated screen to dry thoroughly in a dark, dust-free environment to guarantee the emulsion sets properly. During screen drying, maintain consistent temperature and humidity levels to prevent emulsion softening or uneven curing.
Avoid exposure to direct light, which can prematurely harden the emulsion and ruin your stencil. Once dry, conduct a meticulous quality inspection to verify uniform emulsion coverage and absence of pinholes or debris that could affect print quality.
Use a bright light source at an angle to detect any imperfections or thin spots. If defects are present, you must recoat and repeat the drying process.
Proper drying and quality inspection are vital steps that directly influence the sharpness and durability of your screenprint, ensuring the best results in your final prints.
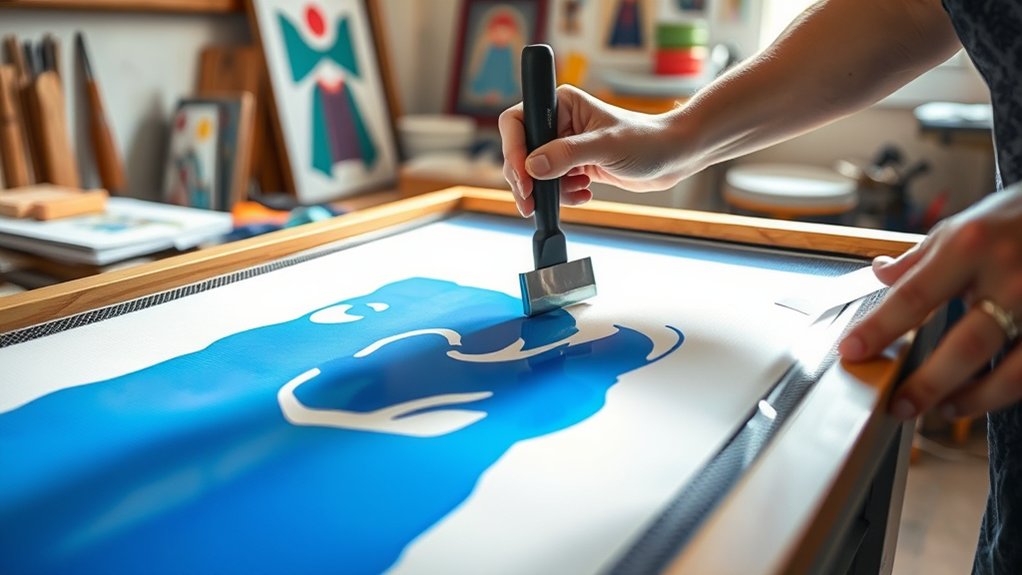
How to Apply Ink and Print Your Screenprinted Design
Begin by aligning your screen accurately over the substrate to guarantee precise registration of your design. Next, pour a controlled amount of ink at the top of the screen. Use a squeegee to apply firm, even pressure, pulling the ink across the stencil in a smooth motion.
This ink application assures the design transfers cleanly onto the substrate. Employ consistent print techniques, such as a 45-degree angle and steady speed, to avoid smudging or uneven coverage.
| Step | Description |
|---|---|
| Align Screen | Position screen precisely |
| Ink Application | Pour and spread ink evenly |
| Printing Motion | Pull squeegee with consistent force |
Master these actions to achieve sharp, vibrant prints every time.
How to Cure and Finish Your Screenprinted Item
After printing your design, you need to cure the ink properly to confirm durability and washfastness. Use appropriate curing techniques, such as conveyor dryers or flash curing units, to apply consistent heat at the recommended temperature and duration for the specific ink type.
Typically, curing requires reaching 320°F (160°C) for plastisol inks, confirming the ink binds firmly to the fabric. Monitor temperature with an infrared thermometer to avoid under- or over-curing, which can affect adhesion and color vibrancy.
Once cured, proceed with finishing touches like trimming excess threads, inspecting for imperfections, and performing quality control checks. Proper curing and finishing not only enhance the item’s longevity but also confirm your screenprinted design maintains its intended appearance through multiple washes and wears.
Avoid These Common Screenprinting Mistakes
While mastering screenprinting involves numerous technical steps, avoiding common mistakes is just as essential to guarantee high-quality results. You must prevent screen alignment errors, which cause blurred or double images, and carefully manage ink mixing issues to maintain consistent color quality.
Additionally, improper mesh tension and inadequate drying time can compromise print durability. Use this table to quickly identify and correct frequent errors:
| Mistake | Cause | Solution |
|---|---|---|
| Screen alignment errors | Misaligned registration marks | Calibrate and double-check registration |
| Ink mixing issues | Incorrect ratios or contamination | Use precise measuring tools and clean containers |
| Low mesh tension | Stretched or worn screen | Replace or retension screen |
| Inadequate drying | Insufficient curing time | Follow manufacturer curing guidelines |
| Excess ink application | Overloading squeegee | Adjust squeegee pressure and angle |
Frequently Asked Questions
What Types of Fabrics Work Best for Screenprinting?
You’ll find cotton blends offer excellent fabric compatibility for screenprinting due to their smooth surface and ink absorption. Additionally, polyester and nylon work well, but natural fibers like cotton guarantee sharper, more durable prints with vibrant colors.
Can Screenprinting Be Done on Curved Surfaces?
You’re stepping into a charming challenge. Screenprinting on curved surfaces demands specialized screenprinting techniques, such as flexible screens and precise alignment tools.
These ensure ink evenly adheres despite contours, maintaining crisp, professional results on non-flat items.
How Long Does a Screenprinting Setup Typically Last?
Your screenprinting setup lifespan typically ranges from several hundred to thousands of impressions, depending on maintenance practices like proper cleaning, avoiding screen damage, and using quality inks, which greatly extend its operational durability.
Is Screenprinting Eco-Friendly Compared to Other Printing Methods?
You’ll find screenprinting eco-friendly when using sustainable inks and waste reduction techniques. Its precision minimizes excess materials, making it more sustainable than many methods. This is especially true when combined with water-based inks and efficient screen reclamation processes.
What Are the Cost Differences Between Screenprinting and Digital Printing?
You’ll find screenprinting has a lower cost per unit for large runs, while digital printing offers better cost comparison and printing efficiency on small batches due to minimal setup. This makes it more economical for short runs.
Conclusion
Now that you’ve navigated the nuanced nature of screenprinting, you’re equipped to execute every essential step with exactness and efficiency. By carefully crafting your design, preparing your screen, and applying ink with intentionality, you’ll create crisp, engaging prints.
Remember, mastering meticulous methods minimizes mistakes and maximizes mastery. Stay sharp, stay skilled, and let your screenprinting shine with seamless success. This way, you can turn your creative concepts into compelling, consistent creations every time, fully embracing how screenprinting works.