To clean your 3D printer nozzle, first heat it to the filament’s printing temperature and safely remove any filament.
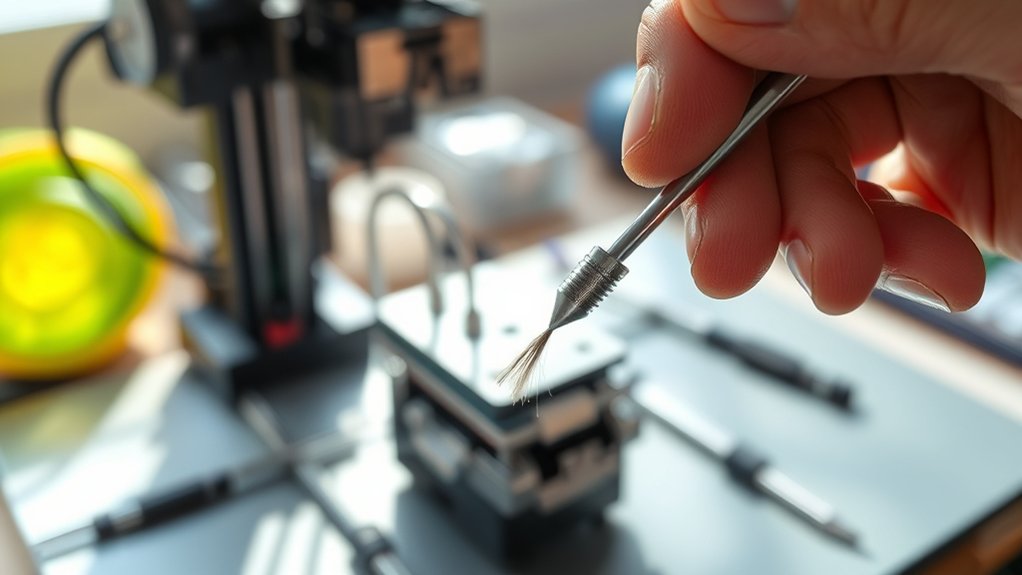
Use a fine needle or brass wire brush to clear debris from the tip. Perform a cold pull with nylon filament to extract stubborn blockage.
For deep cleaning, soak the nozzle in isopropyl alcohol or an appropriate solvent based on filament type.
Regular maintenance prevents clogs and improves print quality. Keep monitoring extrusion consistency and nozzle condition to maintain peak performance.
Further details cover precise techniques and troubleshooting.
Key Takeaways
- Heat the nozzle to the filament’s extrusion temperature before cleaning to soften residual filament for easier removal.
- Use a thin needle or nylon cleaning filament to manually clear clogs and debris inside the nozzle.
- Perform a cold pull by heating, cooling, and pulling nylon filament to extract stubborn particles from the nozzle interior.
- Wipe the nozzle exterior with isopropyl alcohol and use a brass wire brush to remove residual buildup.
- For deep cleaning, soak the nozzle in isopropyl alcohol or acetone (for ABS) to dissolve stubborn clogs before brushing.
How To Clean a 3D Printer Nozzle
Before you begin cleaning your 3D printer nozzle, make sure the printer is turned off and cooled down to prevent burns or damage. Start nozzle maintenance by removing the filament and heating the nozzle to the extrusion temperature suitable for the last used filament type.
Use a brass wire brush to gently clean the exterior, avoiding damage to the nozzle or heater block. For internal cleaning, employ a nylon cleaning filament or a thin needle designed for your nozzle diameter to clear any residual plastic.
Different filament types, such as PLA, ABS, or PETG, may require specific temperatures and cleaning techniques due to their melting points and residue characteristics. Regular, methodical nozzle maintenance guarantees consistent extrusion quality and prolongs nozzle lifespan, minimizing print failures caused by clogs or buildup.
How To Identify When Your Nozzle Needs Cleaning
You’ll know your nozzle needs cleaning when you notice signs of clogging, such as inconsistent filament flow or grinding noises from the extruder.
Pay close attention to print quality indicators like gaps, under-extrusion, or rough surface textures. These symptoms signal that residue buildup is obstructing proper filament extrusion.
Signs of Clogging
How can you tell if your 3D printer nozzle is clogged? Identifying signs of clogging early helps you address issues caused by filament residue or improper temperature settings.
Clogging causes include burnt filament and debris accumulation, which compromise extrusion consistency. Recognizing these signs enables timely cleaning and adherence to prevention tips.
| Sign | Description |
|---|---|
| Filament Grinding | Extruder motor clicks, filament slips |
| Inconsistent Extrusion | Gaps or under-extrusion during printing |
| Increased Print Time | Longer than usual due to reduced flow rate |
Monitoring these indicators guarantees you maintain ideal nozzle function and avoid print failures related to blockages.
Print Quality Indicators
When print quality deteriorates, it often signals that your nozzle requires cleaning. You’ll notice under-extrusion, where layers appear thin or incomplete, indicating partial clogs restricting filament flow.
Stringing and blobs on your print surface also suggest inconsistent extrusion caused by nozzle buildup. Additionally, gaps between layers or uneven surface texture point to nozzle wear or residue affecting extrusion precision.
Monitoring these print quality indicators is crucial for effective nozzle maintenance. Regularly inspect your prints for these defects to preemptively address nozzle issues before they worsen.
Maintaining a clean nozzle guarantees consistent filament flow, preserving dimensional accuracy and surface finish. By acting promptly on print quality changes, you prolong nozzle life and optimize your 3D printer’s performance.
What Tools You Need To Clean Your Nozzle
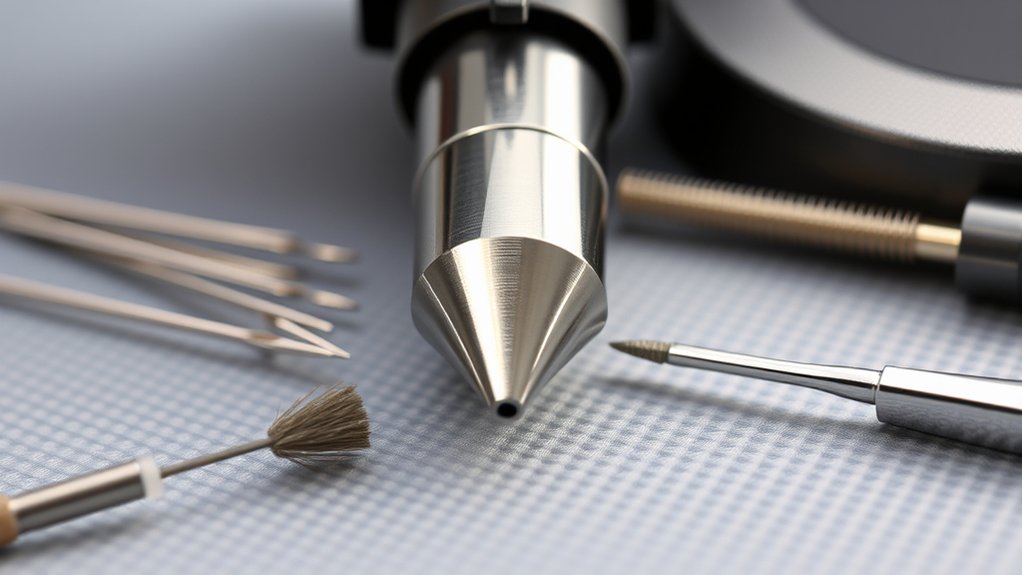
Although cleaning a 3D printer nozzle requires careful attention, having the right tools simplifies the process considerably. Essential cleaning supplies include a brass wire brush and fine needle or acupuncture pin to dislodge residue without damaging the nozzle.
You’ll also need maintenance tools like a set of hex wrenches for nozzle removal and reinstallation, and heat-resistant gloves to protect your hands during hot nozzle handling. Additionally, a small container of isopropyl alcohol helps dissolve filament remnants, while compressed air can clear loose particles effectively.
For thorough maintenance, consider a nozzle cleaning filament designed to burn off internal clogs when the nozzle heats. Equipping yourself with these specific cleaning supplies and maintenance tools guarantees a precise, efficient nozzle cleaning routine that maintains print quality and printer longevity.
How To Manually Clean a Clogged Nozzle
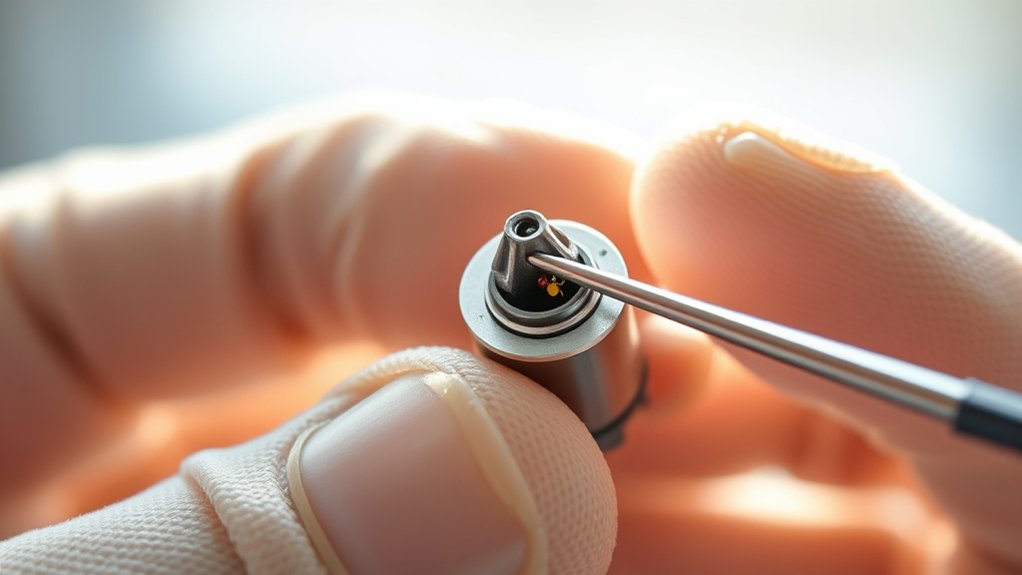
You’ll need a few essential tools like a needle, tweezers, and heat-resistant gloves to safely clear the clog. Begin by heating the nozzle to the printing temperature of the filament, then carefully insert the needle to dislodge any blockage.
Follow this with gentle manual removal of debris using tweezers, ensuring the nozzle is clean and unobstructed before cooling.
Tools Needed
Before you begin manually cleaning a clogged 3D printer nozzle, gather the essential tools to guarantee an efficient and safe process. Following nozzle maintenance tips and cleaning frequency recommendations guarantees longevity and print quality. You’ll need precise instruments to avoid damage and to effectively clear blockages.
| Tool | Purpose |
|---|---|
| Needle or Pin | Clears filament clogs accurately |
| Tweezers | Removes debris and filament residue |
| Heat-resistant Gloves | Protects your hands during heating |
| Small Wire Brush | Cleans nozzle exterior thoroughly |
Having these tools ready streamlines maintenance and minimizes downtime. Use them methodically to adhere to nozzle maintenance tips and cleaning frequency recommendations, preserving ideal extrusion flow and print precision.
Step-by-Step Process
Gathering the right tools prepares you for the precise steps needed to clear a clogged 3D printer nozzle effectively. First, heat the nozzle to the recommended printing temperature to soften residual filament.
Next, carefully unload the filament to avoid further blockage. Use a fine needle or acupuncture pin to gently probe the nozzle tip, dislodging debris without damaging the orifice.
Afterward, perform a cold pull by inserting nylon filament, allowing it to cool, then pulling it out to extract remaining particles. Repeat this step as necessary.
Finally, wipe the nozzle exterior with isopropyl alcohol. Follow nozzle maintenance tips by cleaning your nozzle regularly according to cleaning frequency recommendations, typically after every 50 printing hours, to guarantee consistent extrusion and print quality.
How To Use the Cold Pull Method
One effective way to clear debris from a 3D printer nozzle is the cold pull method, which uses temperature control to extract filament residues. Start by heating the nozzle to the printing temperature of the filament type currently loaded.
Once molten, feed a length of compatible filament, commonly nylon or PLA, into the nozzle. Lower the temperature gradually to just below the filament’s glass change point, typically around 90-110°C for PLA.
When the filament solidifies but remains pliable, firmly pull it out in one smooth motion. This action removes accumulated debris trapped inside the nozzle. Repeat the cold pull process as needed until the filament extracts cleanly.
This technique works best when you select filament types with appropriate melting points and stiffness to maximize residue removal without damaging the nozzle.
How To Soak Nozzles for Deep Cleaning
Soaking your 3D printer nozzle can effectively dissolve stubborn residues and contaminants that cold pulls might miss. To perform deep cleaning, first remove the nozzle and submerge it in a proper soaking solution.
This step complements regular nozzle maintenance by targeting hardened filament buildup inside and outside the nozzle.
| Soaking Solutions | Temperature | Duration |
|---|---|---|
| Isopropyl Alcohol | Room temperature | 30 minutes |
| Acetone (ABS only) | Room temperature | 15-20 minutes |
| Specialized Cleaner | 50-60°C | 1-2 hours |
| Distilled Water | Boiling | 10 minutes |
After soaking, use a fine brush or needle to clear softened debris. Dry the nozzle thoroughly before reinstalling to prevent moisture-related issues.
Troubleshooting Nozzle Cleaning Problems
If your nozzle remains clogged despite thorough cleaning, you might be facing common issues such as improper temperature settings, residual filament buildup, or damage to the nozzle itself. Start by verifying the printing temperature matches the filament’s recommended range; too low a temperature causes incomplete melting, leading to clogs.
Next, inspect for residual filament inside the nozzle. Perform a cold pull or soak to remove stubborn debris. If blockages persist, examine the nozzle tip for wear or deformation, which can disrupt filament flow and require replacement.
Regular nozzle maintenance tips include routine cold pulls and temperature calibration to prevent buildup. Addressing these common clogging causes promptly guarantees reliable extrusion and prolongs nozzle lifespan, improving print quality and reducing downtime.
Frequently Asked Questions
How Often Should I Replace My 3D Printer Nozzle?
You should replace your 3D printer nozzle based on its lifespan, typically after 200-400 hours of printing.
Follow a strict maintenance schedule, inspecting for wear or clogging, to guarantee consistent print quality and prevent damage.
Can Nozzle Cleaning Affect Print Quality Long-Term?
Yes, consistent nozzle cleaning directly improves print reliability by preventing clogs and material buildup.
Regular nozzle maintenance guarantees stable extrusion, maintaining dimensional accuracy and surface finish, which positively affects print quality over the long term.
What Materials Cause the Most Nozzle Clogging?
While flexible filaments offer versatility, they cause more nozzle clogging than standard PLA or ABS due to residue buildup. Incorrect temperature settings exacerbate this, so you must adjust heat precisely for each filament type to prevent blockages.
Is It Safe to Use Chemical Solvents on Nozzles?
You shouldn’t use harsh chemical solvents on nozzles due to chemical safety concerns. Instead, opt for solvent alternatives like specialized cleaning filaments or gentle mechanical cleaning to effectively clear clogs without risking nozzle damage or health hazards.
How Do Different Nozzle Sizes Impact Cleaning Frequency?
Of course, smaller nozzle sizes never clog said no one ever. You’ll notice that as nozzle size decreases, clogging frequency increases, demanding more frequent cleanings to maintain precision and prevent print failures in your 3D projects.
Conclusion
Now that you’ve mastered cleaning your 3D printer nozzle, imagine the smooth flow of filament, like molten metal pouring seamlessly through a narrow channel. Keeping your nozzle spotless guarantees every print emerges crisp and precise. Regular maintenance prevents clogs that disrupt your workflow, saving you time and frustration.
With the right tools and techniques—manual cleaning, cold pulls, or soaking—you’ll maintain peak performance. This turns your printer into a reliable machine ready for flawless creations.
In conclusion, proper cleaning of your 3D printer nozzle is essential to ensure consistent, high-quality prints and extend the life of your equipment.