How Does a Resin Printer Work?
You operate a resin printer by curing layers of liquid photopolymer resin using precise UV light matched to your resin type. The printer builds your object layer by layer, projecting each sliced cross-section onto the resin surface to solidify it.
Your build platform moves to allow fresh resin exposure with every layer, ensuring fine detail and smooth finishes.
Proper calibration and post-processing steps are key to avoid common issues like warping or poor adhesion.
Exploring further reveals essential maintenance and optimization techniques.
Key Takeaways
- Resin printers build objects layer by layer by curing liquid photopolymer resin with UV light exposure.
- The build platform moves vertically to allow fresh resin flow and precise layer formation.
- UV light initiates photopolymerization, solidifying resin selectively according to each sliced layer pattern.
- Post-processing includes cleaning prints with isopropyl alcohol and additional UV curing for strength.
- Calibration of exposure time, resin viscosity, and build platform leveling is critical for print quality.
Understanding Resin vs. Filament 3D Printing
When you compare resin and filament 3D printing, you’re looking at two fundamentally different technologies that impact print quality, speed, and material properties. Resin printing uses liquid photopolymer resin materials cured by UV light, enabling extremely fine detail and smooth surface finishes.
Filament 3D printing, or FDM, relies on thermoplastic filament characteristics such as melting point, viscosity, and layer adhesion, which influence mechanical strength and print speed. Resin materials allow for higher resolution due to their liquid state and precise light curing, while filament characteristics determine dimensional accuracy and structural resilience.
You’ll notice resin prints excel in intricate designs but require post-processing, whereas filament printing offers faster build times and easier material handling but compromises on surface detail. Understanding these distinctions helps you select the right method for your project’s demands.
Main Components of Resin Printers and Their Functions
Although resin printers vary in design, they all contain several key components that work together to produce high-resolution prints. Understanding these parts helps you optimize printer maintenance and select appropriate resin types.
Resin Vat: Holds the liquid resin; its transparency and coating affect curing precision.
Build Platform: Moves vertically to form each layer; accurate calibration guarantees dimensional accuracy.
Light Source: Usually an LCD screen or laser that selectively cures resin; its wavelength must match resin types for effective polymerization.
Z-Axis Mechanism: Controls the build platform’s movement; precision here directly impacts layer thickness and surface finish.
Each component’s role is essential for print quality, longevity, and proper handling during maintenance, guaranteeing consistent, detailed results.
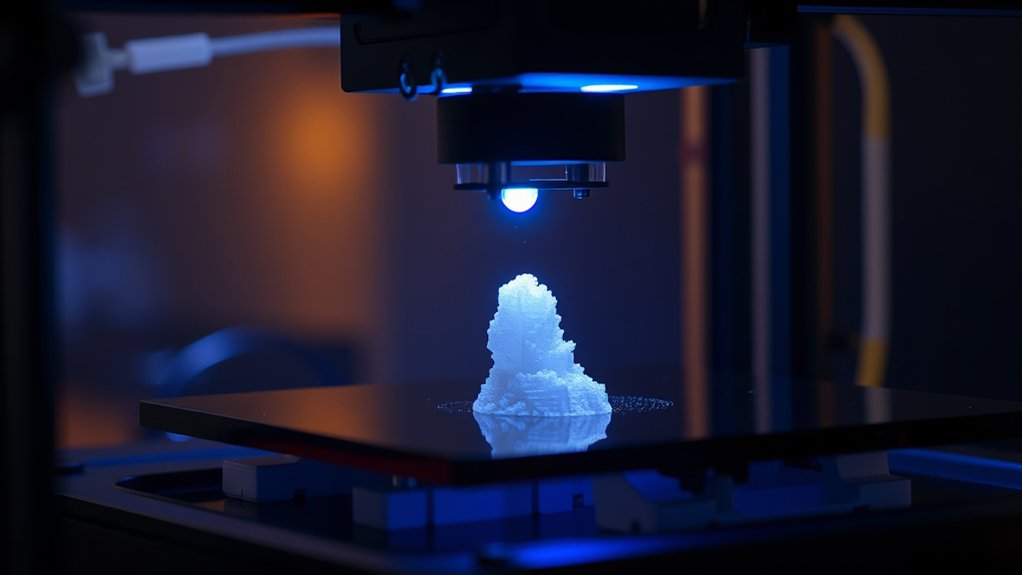
How Resin Printers Build Objects Layer by Layer

Because resin printers cure liquid resin selectively, they build objects layer by layer by exposing each cross-section to a controlled light source. You start by slicing your 3D model into thin layers, with layer thickness often ranging from 25 to 100 microns.
The printer then projects the precise image of each layer onto the resin surface, solidifying it. After curing a layer, the build platform moves to allow fresh resin to flow beneath, preparing for the next exposure.
You can adjust print speed, balancing faster builds with the need for accurate curing and adhesion between layers. This meticulous layering process guarantees dimensional accuracy and surface quality, as each cured layer bonds tightly to the previous one, resulting in a detailed, solid object.
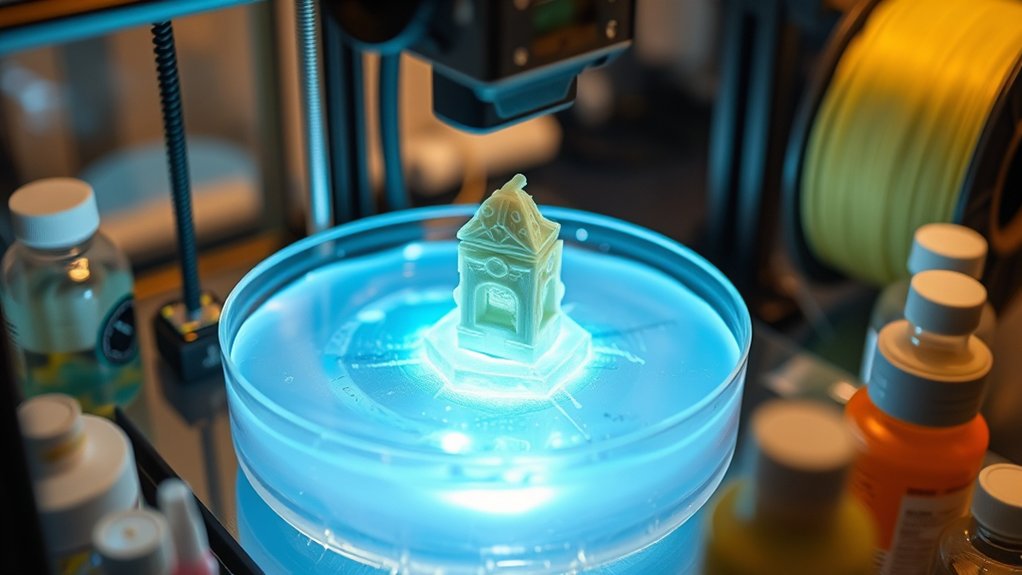
How UV Light Cures Resin During Printing
You’ll see that UV light initiates photopolymerization, triggering the resin’s molecules to bond and solidify precisely where exposed. The printer uses specific UV wavelengths optimized to activate the resin’s photoinitiators efficiently.
This controlled exposure hardens each layer sequentially, building the object with exact dimensional accuracy.
Photopolymerization Process Explained
When ultraviolet (UV) light interacts with the liquid resin in a printer, it triggers a chemical reaction known as photopolymerization. This process converts liquid photopolymer resin into a solid polymer network by initiating cross-linking reactions.
Understanding photopolymer chemistry helps you grasp how different resin types respond to UV exposure. Here’s what happens during photopolymerization:
UV photons excite photoinitiators in the resin, generating reactive radicals. Radicals initiate polymer chain formation, linking monomers into a rigid matrix.
The curing depth and speed vary depending on resin formulation and UV intensity. Solidification occurs layer by layer, precisely controlled to build the 3D object.
Role of UV Wavelengths
Although UV light triggers photopolymerization, the specific wavelengths play a critical role in how effectively the resin cures. You need to understand that different resin formulations respond best to particular UV wavelength ranges, typically between 385 nm and 405 nm.
UV wavelength effects directly influence the activation of photoinitiators within the resin, determining the polymerization rate and the mechanical properties of the cured material. If the wavelength is mismatched, the resin may under-cure or over-cure, compromising detail and strength.
Additionally, you must carefully control UV exposure duration; too brief, and the resin remains partially liquid, too long, and it becomes brittle or overexposed. Balancing these parameters guarantees precise solidification and dimensional accuracy, making UV wavelength and exposure duration critical variables in resin 3D printing.
Layer-by-Layer Solidification
Since resin 3D printing relies on controlled photopolymerization, the process of layer-by-layer solidification is fundamental to building accurate models. When UV light hits the liquid resin, it cures selectively, solidifying each thin layer according to the digital model.
You control layer thickness precisely to optimize print resolution and detail fidelity. This iterative curing process involves:
- Projecting UV patterns that define each layer’s geometry
- Rapidly solidifying resin within the exposed areas
- Adjusting layer thickness to balance detail and print speed
- Lowering the build platform incrementally to allow fresh resin flow
Preparing Your 3D Model and Slicing Settings for Resin Printing
Before you start resin printing, you must ascertain your 3D model is optimized and properly prepared for slicing software. Begin by inspecting the model for errors such as non-manifold edges, holes, or intersecting geometry that could compromise print quality. Use mesh repair tools to ascertain watertight integrity, as resin printers require precise surface definitions.
Next, orient the model to minimize support structures and reduce overhangs, improving print success and surface finish. When configuring slicing software, set layer height, exposure time, and lift speed according to resin specifications and printer capabilities. Adjust support density and contact point size to balance stability and ease of removal.
Proper model optimization combined with accurate slicing settings ascertains reliable layer curing and precise reproduction of intricate details inherent in resin printing.
Common Post-Processing Steps to Perfect Resin Prints
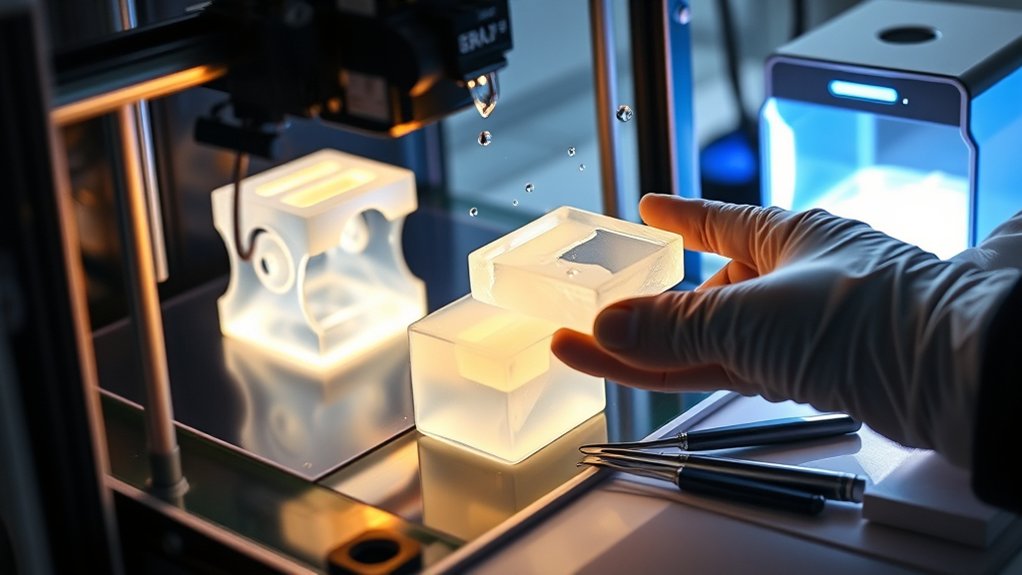
Once your resin print completes with ideal slicing settings and model preparation, post-processing steps confirm the final piece meets quality standards. You’ll start with thorough resin cleaning to remove uncured resin residues, typically using isopropyl alcohol baths and gentle agitation.
Next, curing the print under UV light guarantees full polymerization, enhancing mechanical strength and dimensional stability. After curing, carefully removing support structures prevents surface damage.
Finally, you refine print finishing by sanding or polishing to achieve smooth surfaces and precise details. These steps include:
- Resin cleaning with isopropyl alcohol to eliminate uncured resin
- Controlled UV curing for complete polymerization
- Support removal with minimal surface impact
- Print finishing via sanding or polishing for detail enhancement
Mastering these techniques guarantees your resin prints look professional and perform reliably.
Fixing Common Resin Printing Problems
You’ll often encounter issues like incomplete resin curing, poor layer adhesion, or print warping during resin printing. Addressing these problems requires adjusting exposure times, optimizing resin temperature, and ensuring proper bed leveling.
Let’s explore targeted solutions to fix these common challenges and improve your print quality.
Resin Curing Issues
Although resin printers offer high-resolution results, resin curing issues can greatly impact print quality and durability. You need to carefully manage resin viscosity and curing time to avoid under- or over-curing. If the resin is too viscous, it may not spread evenly, causing incomplete cures. Conversely, improper curing time can lead to brittleness or tackiness.
To troubleshoot resin curing issues, consider these steps:
Adjust resin temperature to optimize viscosity for smooth layer formation.
Calibrate exposure settings to guarantee proper curing time per layer.
Use UV post-curing to strengthen prints without warping.
Clean prints thoroughly to remove uncured resin and improve surface finish.
Layer Adhesion Problems
When layers fail to bond properly during resin printing, the structural integrity and surface quality of your model suffer greatly. Layer bonding depends on ideal exposure times and resin viscosity; insufficient curing between layers weakens adhesion, causing delamination.
To enhance layer bonding, adjust your printer’s exposure settings to guarantee each layer cures thoroughly without overexposing. Also, maintain proper resin temperature, as cold resin increases viscosity and impedes adhesion.
Employ adhesion techniques such as using a fresh resin vat and verifying the build plate surface is clean and properly leveled. Additionally, improve the lift speed to minimize stress on the bonding layers.
Print Warping Solutions
Since resin printing involves curing liquid photopolymer layer by layer, uneven shrinkage during this process often causes print warping. To minimize warping, you need to optimize print bed adhesion and carefully consider model orientation.
Strong adhesion prevents the model from detaching mid-print, which leads to distortion. Additionally, orienting the model to reduce large flat surfaces in contact with the bed helps distribute stress evenly. Here are effective solutions:
- Use a textured or treated print bed to enhance adhesion.
- Adjust exposure times to guarantee complete layer curing without overexposure.
- Orient models at slight angles to minimize stress concentration.
- Employ brim or raft structures to increase the contact area with the bed.
Frequently Asked Questions
How Safe Is Resin Printing for Indoor Use?
Resin printing indoors is safe if you follow ventilation requirements and use safety precautions like gloves and masks. Proper air circulation prevents fumes buildup, minimizing health risks and ensuring a controlled, secure printing environment for you.
What Types of Resin Are Best for Beginners?
You’ll find beginner friendly resins like standard and plant-based types simplify resin curing techniques immensely, making your first prints smoother than a laser-guided missile’s path, ensuring precise, safe, and successful creations right from the start.
Can Resin Prints Be Painted or Dyed?
Yes, you can paint resin prints using advanced painting techniques like airbrushing or layering acrylics.
Dye options include alcohol-based or fabric dyes, which penetrate cured resin for vibrant, lasting color customization.
How Long Do Resin Prints Last Without Degradation?
Resin prints typically last several years without degradation, but resin longevity factors like UV exposure, humidity, and heat matter. You’ll extend print life by storing them in a cool, dark, dry place, minimizing environmental damage.
Are There Eco-Friendly Options for Resin Disposal?
You can choose biodegradable resins to minimize environmental impact, and follow specific recycling methods like curing leftover resin before disposal. These approaches guarantee safer handling and reduce toxic waste from resin printing processes effectively.
Conclusion
As you master each step—from preparing your model to curing resin with precise UV exposure—you’ll realize how seamlessly technology and chemistry coincide to create detailed, durable prints.
It’s not just about printing; it’s about controlling every layer, every photon, to bring your vision to life with exactness.
When challenges arise, your technical skills become the key to perfection, proving that resin printing is as much an art as it is a precise science.
Understanding how a resin printer works allows you to harness this blend of technology and chemistry to achieve exceptional results every time.