To use a heat press for T-shirts, start by laying your clean, wrinkle-free shirt flat on the press’s lower platen, smoothing out any bumps. This ensures a smooth surface for the design to transfer properly.
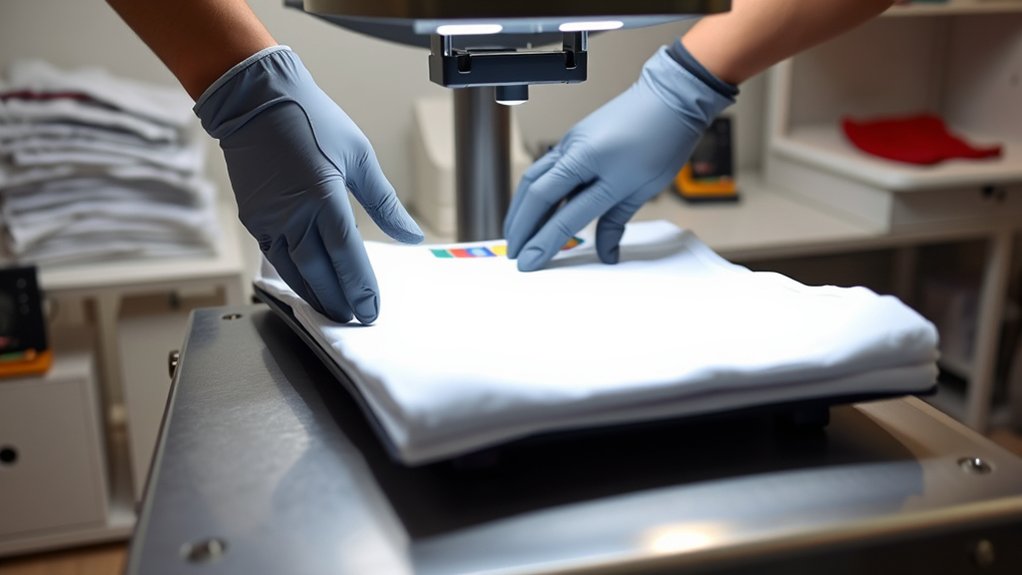
Next, place your vibrant transfer paper carefully, aligning the design with the shirt’s center using heat-resistant tape.
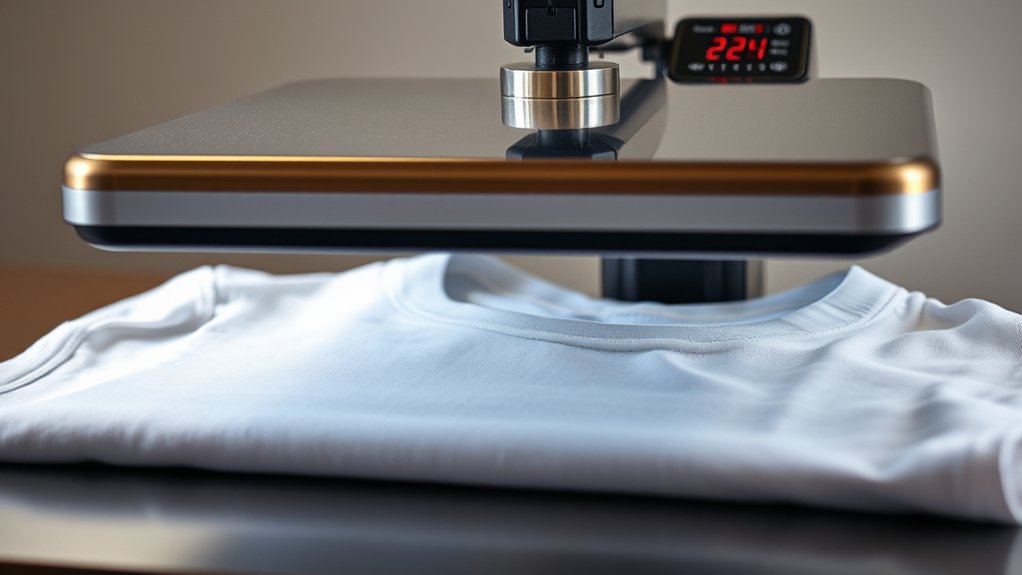
Setting the press to the right temperature and time is crucial—usually 350°F and 15 seconds for cotton fabric.
Close the press firmly and apply even pressure. After the timer goes off, peel the backing as instructed for a crisp, lasting print.
Master these steps, and you’ll soon create stunning shirts with ease.
Key Takeaways
- Preheat the heat press to the recommended temperature based on fabric type for optimal transfer quality.
- Lay the t-shirt flat, smooth wrinkles, and mark the center for precise design placement.
- Position the transfer paper or vinyl design aligned with the shirt’s center before closing the press.
- Apply even pressure and maintain the specified dwell time to ensure vibrant, durable prints.
- Peel the backing according to material instructions and inspect the final print for crispness and adhesion.
Materials and Tools for Heat Pressing T-Shirts

Before you start pressing, gather the essential materials and tools that will make your T-shirt designs pop. First, your heat press is the heart of the process, a machine that applies consistent heat and pressure, guaranteeing your designs fuse flawlessly onto fabric.
Next, you’ll need quality transfer paper, designed to hold your vibrant artwork and release it cleanly onto your T-shirt. Pick transfer paper compatible with your fabric type for the best results.
Don’t forget a Teflon sheet or parchment paper to protect your design and heat press platen from scorching. A heat-resistant glove helps you handle hot items safely.
Finally, verify your T-shirts are clean and wrinkle-free, ready to receive your bold, eye-catching designs. These tools set the stage for perfectly pressed custom tees.
Preparing Your Design and T-Shirt for Heat Pressing
Before you press, choose a design that pops and suits your shirt’s fabric like a glove. Make sure your t-shirt is clean and wrinkle-free to create a smooth canvas.
Then, carefully place your design exactly where you want it to shine, using a ruler or guide for perfect alignment.
Design Selection Tips
How do you guarantee your design pops perfectly on your t-shirt once it hits the heat press? It all starts with smart design selection. Your graphic design should be bold and clear, avoiding overly intricate details that can blur under heat.
Next, master your color selection. Choose contrasting hues to make your artwork leap off the fabric. Finally, consider the design size and placement; it should complement the shirt’s shape without overwhelming it.
- Simplify your graphic design for sharp, crisp results.
- Pick high-contrast colors to ensure vividness after pressing.
- Size and position your design strategically for balance and impact.
T-Shirt Material Preparation
Once you’ve nailed your design, preparing both your t-shirt and artwork for the heat press is crucial to achieving flawless results. Start by selecting the right t shirt sizing to guarantee your design fits perfectly without stretching or bunching.
Next, perform fabric pre washing to remove any chemicals or shrinkage risks. This step prevents distortions after pressing. Lay your shirt flat, smoothing out wrinkles for a clean surface.
Meanwhile, double-check your design’s print quality and trim excess transfer paper if needed. These careful prep steps create a smooth canvas and sharp image, setting you up for a crisp, vibrant heat press finish every time.
Skipping them could lead to misaligned designs or faded prints, so don’t rush this critical phase.
Positioning Your Design
Two key elements define perfect placement: alignment and spacing. Mastering design alignment guarantees your graphic sits crisply and evenly on the shirt, while a smart placement strategy assures visual balance.
Start by laying your t-shirt flat, smoothing wrinkles to create an even canvas. Then:
- Measure the shirt’s width and mark the center with a small piece of heat-resistant tape.
- Align your design’s center with the shirt’s center mark, adjusting vertically for neckline or pocket placement.
- Double-check spacing from seams and collar to avoid awkward cuts or crowding.
This method keeps your design visually striking and professionally positioned, making every heat press result a showstopper. With precision in positioning, you transform a simple tee into wearable art.
Step-by-Step Heat Press Guide for T-Shirts
Mastering the heat press process involves a series of clear, deliberate steps that transform your blank t-shirt into a custom work of art. First, preheat your press to the recommended temperature. Place your t-shirt flat on the lower platen, smoothing out wrinkles to guarantee perfect design alignment.
Position your transfer paper or vinyl design carefully on the shirt, double-checking placement with a ruler or guide. Close the press firmly, applying even pressure, a key heat press technique. Hold for the specified time, then lift the press slowly to avoid shifting.
Peel the backing according to your material’s instructions, revealing the vibrant, crisp image. With practice, these steps become second nature, letting you create professional-quality t-shirts every time.
Adjusting Temperature and Time Settings for Different Fabrics

You’ll want to match your heat press’s temperature and timing to the fabric’s unique needs. Cotton, polyester, and blends each demand a different touch.
Think of it like tuning an instrument: too hot or too long can scorch, too cool or brief won’t stick. Adjusting these settings carefully guarantees your designs come out crisp and vibrant every time.
Fabric Type Temperature Guide
Different fabrics react uniquely to heat, making it essential to adjust your heat press settings accordingly. To protect your garments and guarantee vivid transfers, you’ll want to familiarize yourself with specific fabric types and their ideal temperature ranges.
Here’s a quick guide:
- Cotton: Generally tolerates higher heat, around 350°F to 375°F, perfect for bold, vibrant designs.
- Polyester: Requires lower temperatures, usually 300°F to 320°F, to prevent melting or scorching.
- Blends (Cotton/Polyester): Aim for a moderate range, about 320°F to 340°F, balancing heat sensitivity.
Time Settings Per Material
Timing plays an essential role when using a heat press, as each fabric demands a delicate balance between temperature and duration to achieve a flawless transfer. Mastering heat transfer techniques means tailoring time settings to your fabric selection. Too long or hot, and you risk scorching; too short or cool, and the design won’t adhere properly.
| Fabric Type | Time (seconds) |
|---|---|
| Cotton | 15-20 |
| Polyester | 10-15 |
| Nylon | 8-12 |
| Linen | 15-18 |
| Canvas | 20-25 |
Adjust your heat press timer with precision for each material, ensuring your designs pop without damage. This calibration reveals vibrant, lasting prints every time.
Adjusting Heat For Blends
When working with fabric blends, striking the right balance between heat and time becomes a delicate art. Polyester blends and cotton blends react differently under heat, so you’ll need to fine-tune your settings carefully. Here’s how to adjust:
- Lower the temperature by 10-15°F for polyester blends to prevent melting or scorching.
- Increase time slightly for cotton blends to guarantee proper ink absorption without burning fibers.
- Always test on a small swatch to observe how the blend handles heat and pressure.
Visualize the fabric as a living canvas. Too hot, and it distorts; too cool, and the design won’t set. Mastering these subtle variations guarantees vibrant, durable prints that honor the unique nature of each blend.
Tips for Smooth, Durable Heat Press Transfers
Mastering just a few essential techniques can transform your heat press transfers from average to exceptional. Start by ensuring your garment lies flat and wrinkle-free. Any creases can cause uneven pressure and distort the design.
Use consistent pressing techniques: apply firm, even pressure throughout the entire pressing time, avoiding rocking or shifting. Pre-press your shirt for a few seconds to remove moisture, which boosts transfer durability.
Choose the right temperature and time settings for your material, and always follow the transfer paper’s instructions closely. After pressing, peel the backing slowly and carefully at the recommended temperature. Hot or cold peel can affect the finish.
These deliberate steps will help you produce smooth, vibrant transfers that hold up wash after wash, showcasing your craftsmanship with every shirt you create.
Common Heat Press Mistakes and How to Fix Them
Even the most experienced heat press users run into occasional hiccups, but recognizing common mistakes early can save you time and frustration. When you face heat press troubleshooting, pinpoint these common errors:
- Uneven Pressure: If your design peels or fades, adjust the pressure knob evenly. Too little pressure won’t bond the transfer; too much can damage fabric.
- Incorrect Temperature: Too hot scorches shirts; too cool results in weak adhesion. Use a reliable thermometer or calibrate your press regularly.
- Insufficient Dwell Time: Rushing the process leaves incomplete transfers. Stick to recommended times for your material and transfer type.
Spotting these issues quickly lets you fix them, ensuring crisp, vibrant T-shirt prints every time. Keep your workflow smooth by mastering these heat press troubleshooting essentials.
Frequently Asked Questions
Can I Use a Heat Press for Other Items Besides T-Shirts?
You can definitely explore heat press applications beyond t-shirts! Just check fabric compatibility first. Cotton, polyester, and blends work great.
Try bags, hats, or even ceramic tiles to create vibrant, personalized designs with ease.
How Do I Clean and Maintain My Heat Press Machine?
Like tuning a vintage gramophone, you should regularly wipe the platen with a soft cloth and mild cleaner. Use proper cleaning techniques and maintenance tips. Lubricate moving parts and check pressure to keep your heat press humming smoothly.
What Are the Best Brands of Heat Press Machines for Beginners?
You’ll love brands like Cricut, Fancierstudio, and PowerPress for their intuitive heat press features. These best beginner brands offer precise temperature control and user-friendly designs, making your creative T-shirt projects smooth and effortless.
Is It Safe to Use a Heat Press at Home Without Professional Training?
Imagine burning your fingers on a hot plate. That’s why you need strict safety precautions.
You can safely use a heat press at home by following heat press tips, like wearing gloves and working in a clutter-free area.
How Much Electricity Does a Heat Press Typically Consume?
A typical heat press consumes around 800 to 1500 watts, so you’ll want to take into account its power consumption for energy efficiency.
Using it efficiently minimizes electricity use while still pressing vibrant, crisp designs every time.
Conclusion
Now that you’ve got the basics down, don’t let worries about tricky settings hold you back—heat pressing is more forgiving than it seems. With the right prep and a keen eye on temperature and timing, your designs will pop with vibrant, lasting color.
Picture your perfect tee coming to life, smooth and flawless. Just keep practicing, adjust as needed, and soon, you’ll create heat-pressed masterpieces that feel as good as they look.
Mastering how to use a heat press for T shirts will open up endless creative possibilities and ensure your custom apparel stands out with professional quality every time.