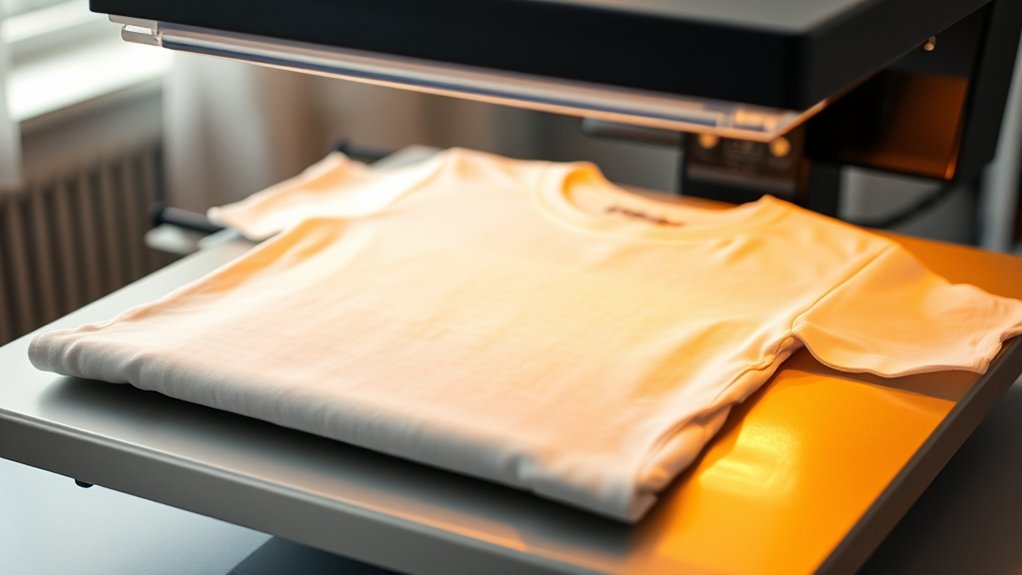
To heat press t-shirts, first select a suitable machine with the right platen size and adjustable pressure.
Preparing your fabric is essential—pre-wash, iron flat, and use high-quality, mirrored design files for the best results.
Set your machine to the correct temperature, usually between 350-375°F, with a time of 10-20 seconds and medium pressure depending on the fabric type.
Position your design carefully on the shirt before pressing.
After pressing, peel the transfer at the recommended temperature to ensure the design adheres properly.
Proper finishing and care after heat pressing will extend the durability of your t-shirts.
Following these steps guarantees professional results, and understanding the nuances will improve your process further.
Key Takeaways
- Choose a suitable heat press machine with the correct platen size, temperature range, and adjustable pressure for your design and fabric type.
- Pre-wash and iron 100% cotton or cotton-poly blend t-shirts to remove residues and wrinkles before pressing.
- Set temperature between 320°F and 375°F, press time between 10-20 seconds, and use medium pressure depending on fabric and transfer material.
- Peel the transfer at the recommended temperature and apply gentle pressure with a heat-resistant tool to secure the design.
- Wash shirts inside out with cold water, avoid bleach and fabric softeners, air dry or use low heat, and store folded with the design inward.
What Is Heat Pressing and Why Use It for T-Shirts?
Although heat pressing might seem complex at first, it’s a precise method that uses controlled temperature and pressure to transfer designs onto t-shirts. You position a printed heat transfer design onto the fabric, then apply heat and pressure via the heat press machine.
Heat pressing uses precise temperature and pressure to transfer designs seamlessly onto t-shirts for lasting results.
This activates the adhesive in the transfer, bonding the design permanently to the shirt fibers. Compared to other design techniques, heat pressing offers durability, vibrant colors, and consistent results.
You can use various heat transfer materials, like vinyl or sublimation paper, each requiring specific temperature and time settings. By mastering these parameters, you guarantee peak adhesion and prevent damage to fabric or design.
Heat pressing is ideal for producing professional-quality, customizable t-shirts efficiently and with minimal setup.
How to Choose a Heat Press Machine for T-Shirts
When selecting a heat press machine for t-shirts, you need to take into account factors like platen size, temperature range, and pressure control to guarantee it matches your production volume and design requirements. Start by comparing the types of machines: clamshell, swing-away, and draw models. Each offers unique heat press features suited for different workflows. Consider these critical aspects:
Platen size: Make sure it accommodates your largest design without sacrificing heat distribution.
Temperature range: Verify it supports the materials and transfer types you use.
Pressure control: Opt for adjustable pressure to handle various fabric thicknesses effectively.
Prepare Your T-Shirt Fabric and Design File for Heat Press
Before you start heat pressing, make sure your t-shirt fabric is clean and wrinkle-free to achieve ideal transfer results. Begin with fabric selection: choose 100% cotton or cotton-poly blends, as synthetic fibers may affect ink adhesion.
Pre-wash the t-shirt without fabric softeners to remove residues and shrinkage. Iron the fabric to eliminate wrinkles that can cause uneven heat distribution.
For design preparation, verify your artwork is high-resolution (300 dpi) and mirrored, especially for text or directional images. Use vector files or PNGs with transparent backgrounds to maintain sharp edges.
Adjust the design size to fit the printable area on the t-shirt without distortion. Finally, perform a test print on heat-resistant paper to confirm color accuracy and alignment before transferring your design onto the fabric.
How to Set Temperature, Time, and Pressure for Heat Pressing
You’ll need to set your heat press to the ideal temperature, typically between 350°F and 375°F, depending on your transfer material. Adjust the timer to the best pressing duration, usually around 10 to 15 seconds, to guarantee proper adhesion without scorching.
Finally, apply the correct pressure, firm and even, so the design bonds smoothly with the fabric fibers.
Ideal Temperature Settings
Although setting the correct temperature is essential, you must also calibrate the time and pressure to guarantee a durable, vibrant print. The ideal temperature varies depending on the fabric types used.
For cotton, set your heat press to 375°F (190°C), while polyester requires a lower temperature, around 320°F (160°C), to prevent scorching. Blends demand careful adjustment, often around 350°F (175°C).
To achieve excellent results, consider the following:
Use a temperature-controlled heat press for consistent accuracy.
Adjust pressure to medium to avoid fabric damage or incomplete transfer.
Test a small fabric swatch before full production to confirm settings.
Optimal Pressing Duration
Setting the correct temperature is only one part of the equation; determining the ideal pressing duration guarantees the transfer adheres properly without scorching or fading. Best pressing techniques require precise control over pressing time, typically ranging from 10 to 20 seconds depending on the material and transfer type.
Too short, and adhesion weakens; too long, and the design risks damage.
| Material Type | Recommended Pressing Time |
|---|---|
| Cotton | 15 seconds |
| Polyester | 20 seconds |
| Cotton/Poly Blend | 15-18 seconds |
| Sublimation | 15 seconds |
| Heat Transfer Vinyl | 10-15 seconds |
Adjust pressing time based on transfer thickness and heat press calibration to provide consistent results every time.
Correct Pressure Application
Three key factors, temperature, time, and pressure, work together to assure successful heat pressing. Correct pressure application guarantees the transfer adheres firmly without damaging the fabric.
Start by performing pressure calibration on your heat press to confirm the machine applies uniform force across the platen. Use the manufacturer’s pressure gauge or test sheets to gauge the pressure level.
Next, make precise pressure adjustment based on the garment type and transfer material. Too little pressure results in weak adhesion; too much can cause fabric distortion or ink bleed.
- Calibrate pressure using test prints before production
- Adjust pressure gradually for delicate or thick fabrics
- Document settings for repeatability and quality control
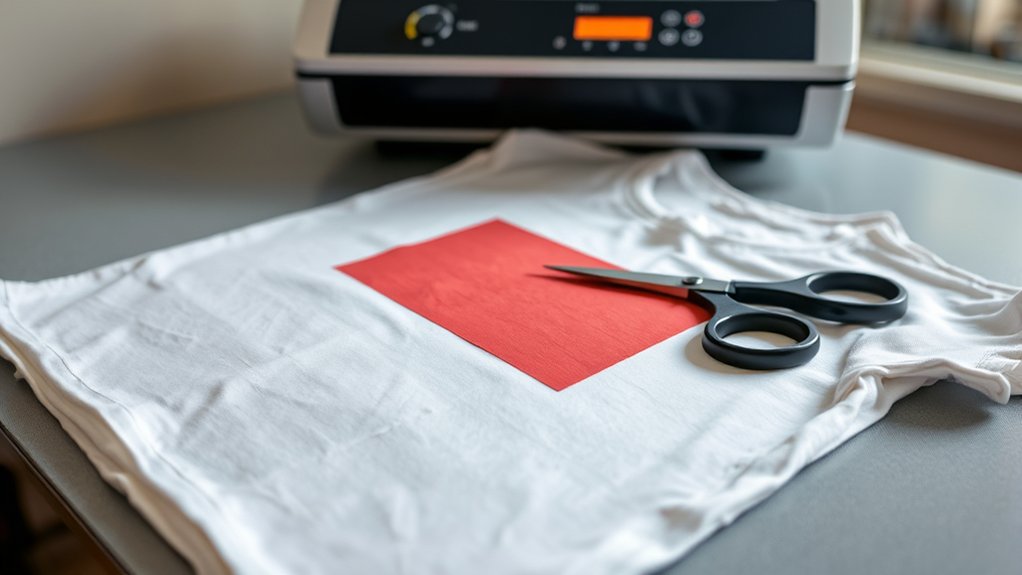
Position and Heat Press Your Design
Place your design carefully on the t-shirt, ensuring it aligns precisely with the garment’s center or desired area. Use alignment techniques like measuring the distance from the collar or side seams to confirm symmetry.
Align your design precisely with the t-shirt center, using measurements from collar or seams for perfect symmetry.
Employ a ruler or alignment grid to verify horizontal and vertical placement. Once positioned, secure the design with heat-resistant tape to prevent shifting during pressing.
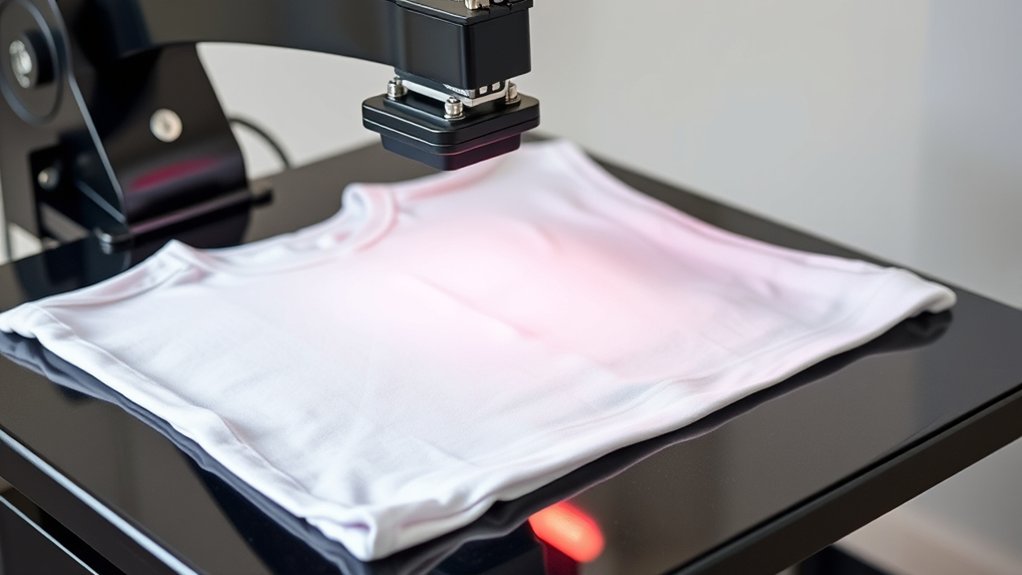
Preheat your heat press to the recommended temperature for your transfer material. Set the appropriate pressure level as previously determined.
Place the t-shirt with the design on the press platen, ensuring no wrinkles or folds interfere. Lower the heat press evenly and engage the timer according to your transfer’s specifications.
Maintain firm, consistent pressure throughout the pressing cycle for ideal adhesion and crisp results.
Peel the Transfer, Finish, and Care for Your Heat Pressed T-Shirt
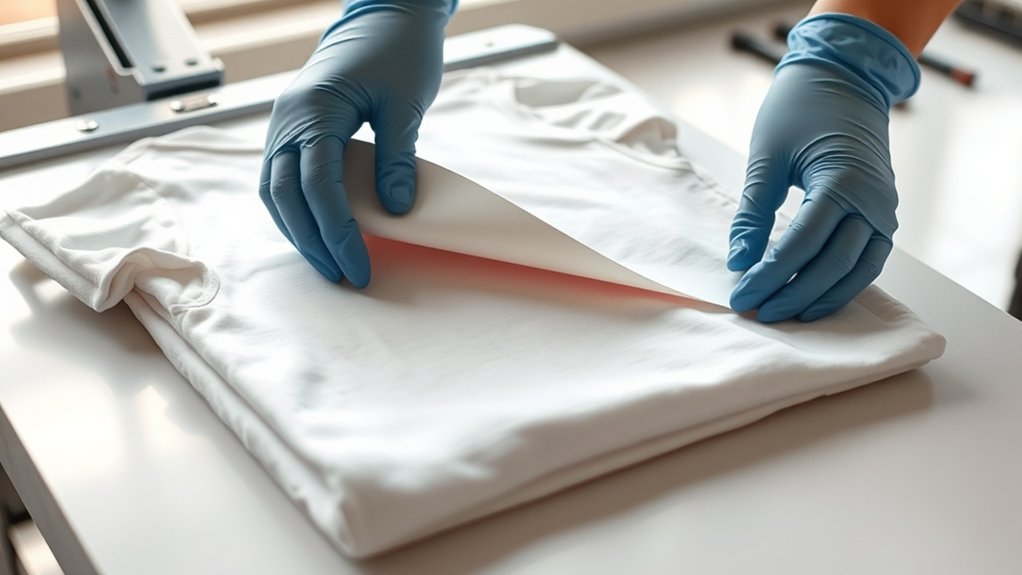
Once the pressing cycle completes, you need to peel the transfer carefully at the specified temperature, hot peel for some designs, cold peel for others, to guarantee proper adhesion. After peeling, apply gentle pressure with a heat-resistant tool to secure the design and prevent lifting.
Finally, follow recommended laundering guidelines, like washing inside out and avoiding high heat, to maintain your t-shirt’s print quality over time.
Peel Timing Techniques
Although the heat press cycle may be complete, you shouldn’t remove the transfer immediately without considering the peel timing. Peel timing varies greatly based on the transfer types, influencing adhesion quality and durability. Understanding whether to peel hot, warm, or cold guarantees ideal results.
Key peel timing techniques include:
- Hot Peel: Remove immediately while the transfer is hot; common with plastisol and some vinyl transfers.
- Warm Peel: Allow the transfer to cool slightly before peeling; typical for glitter and specialty vinyls.
- Cold Peel: Wait until the transfer is fully cooled; necessary for sublimation and certain heat transfer papers.
Post-Press Care Tips
After determining the correct peel timing, carefully lift the transfer to avoid damaging the design or fabric. If your instructions specify a hot peel, remove the carrier sheet immediately; for a cold peel, wait until fully cooled.
Once peeled, allow the garment to rest flat in a ventilated area to stabilize the adhesive. For post press storage, fold the shirt with the design facing inward to prevent cracking or fading.
When it comes to fabric care, wash the heat-pressed T-shirt inside out in cold water using mild detergent. Avoid bleach and fabric softeners, and opt for air drying or low heat in the dryer to preserve the print’s integrity.
Following these precise steps guarantees longevity and maintains the quality of your heat-pressed design.
Frequently Asked Questions
Can Heat Pressing Damage the Heat Press Machine?
Yes, improper use or neglecting heat press maintenance can damage your machine, shortening its lifespan. You should regularly clean and calibrate the temperature.
Avoid overheating to guarantee consistent performance and extend your heat press machine’s durability.
What Types of Inks Work Best for Heat Pressing?
Like Da Vinci’s precision, you’ll find sublimation inks excel with polyester fabrics for vibrant, permanent designs, while screen printing inks suit cotton blends, offering durability. Choose based on fabric type and desired finish for ideal heat pressing results.
How Do Humidity and Weather Affect Heat Pressing Results?
You’ll notice humidity levels and weather conditions impact ink curing time and fabric moisture, causing inconsistent adhesion or color shifts. Adjust pressing temperature and time accordingly to guarantee ideal transfer and consistent heat press results regardless of environment.
Can You Heat Press on Polyester Fabrics?
You can’t put all your eggs in one basket. Polyester blends require careful heat transfer. Use lower temperatures (around 300°F), quick press times, and a Teflon sheet to avoid melting or scorching during heat pressing on polyester fabrics.
What Safety Precautions Should I Take While Heat Pressing?
You should follow heat press safety by wearing heat-resistant gloves, ensuring proper ventilation, and keeping a clean workspace.
Regular equipment maintenance, like checking pressure and cleaning plates, prevents accidents and guarantees consistent, safe operation.
Conclusion
You’ve transformed a plain T-shirt into a personalized masterpiece using precise temperature, timing, and pressure settings. Like the contrast between cold fabric and heated platen, your careful preparation meets exact machine control to create a lasting bond.
As you peel away the transfer, you witness the shift from raw material to finished product—proof that mastering each step turns a simple shirt into wearable art. This process ensures the design’s durability and vibrancy.
With these skills, you are well-equipped to produce high-quality custom apparel. Mastering how to heat press T shirts is the key to consistently achieving professional and long-lasting results.